- V
- GF
- NS
- DF
- View Recipe Key
Homemade Angel Food Cake (VIDEO)
Homemade Angel Food Cake (VIDEO)

Homemade angel food cake is a simple but exquisite cake that is the perfect companion to summer berries and whipped cream. Learn how to make it from scratch with step-by-step instructions, clever tips, and a short video!

This post contains affiliate links. Full disclosure is at the bottom of the article.
I have this one, crystal-clear memory of my childhood summers: my mom bringing home a beautiful, cloud-like cake she’d picked up from the market to go with the first strawberries of the season. I’d get the biggest slice I could manage and absolutely drown it in berries and whipped cream. The cake itself was almost impossibly light—a vanilla-scented treat that perfectly complemented juicy berries.
That’s the feeling I wanted to recreate with my homemade angel food cake recipe: a little slice of pure, airy nostalgia. It’s a surprisingly simple cake to make, and one of my favorites because it’s so wonderfully light.

There’s a reason I keep coming back to this classic. An angel food cake is like the little black dress of desserts: stunning on its own, but also the perfect backdrop for anything you want to pair with it.
Homemade angel food cake looks like it took hours of painstaking work, but the truth is, it’s one of the simpler cakes in my repertoire. It’s all about the technique. Once you get the feel for it, you’ll see why it’s such a treasure.
This is the angel food cake recipe that will make you forget the store-bought versions forever!
Helpful Tips to Make Homemade Angel Food Cake
Over the years, I’ve learned that making a great angel food cake isn’t about being a professional baker; it’s about respecting a few simple rules. Don’t let the list scare you—think of this as me sharing all my secrets with you.
This is how to make angel food cake that truly lives up to its name!

VIDEO: How to Make Angel Food Cake
Make sure to check out my short How to Make Angel Food Cake video to visualize the process.
Make Sure Your Tools Are Spotless
I learned this one the hard way. Even a tiny, invisible speck of oil or grease will stop your egg whites from whipping up into the magnificent fluff you need. So, before you do anything, give your bowl and beaters a good scrub with hot, soapy water and dry them completely. A clean start is everything.
Treat Your Eggs Like Divas
Egg whites are temperamental. They separate most easily when they’re cold, so do that first. But then—and this is key—let them sit on the counter for a half-hour or so to come to room temperature. They whip up with so much more volume when they aren’t chilled. And be a hawk about keeping any trace of yolk out of your whites!
Take an Egg White Shortcut
To make homemade angel food cake, you can use liquid egg whites sold in a carton (such as NatureEgg Simply Egg Whites or Egg Beaters All Natural 100% Egg Whites). It’s a lot easier and faster than separating 12 eggs! Plus, you won’t have to figure out what to do with the 12 leftover egg yolks—although I have tips for that too, below.
Cake Flour Is Key
This isn’t the time for sturdy, all-purpose flour. Cake flour is finer and has less protein, which gives it a softer personality. Cake flour is what creates that incredibly tender, melt-in-your-mouth quality that makes homemade angel food cake so famous.
Sifting Flour is a Non-Negotiable Ritual
Skipping the sifting step? Don’t even think about it! You want the flour and sugar to be as fine and airy as possible so they can be folded gently into the whites without deflating them. This is what gives you that signature, seamless crumb without any little lumps.

Be (Very) Gentle When Mixing the Ingredients Together
When you combine the dry ingredients with your beautifully whipped egg whites, be gentle. This isn’t a race! You’re not mixing; you’re folding. Use a spatula to cut down the middle and gently sweep the batter from the bottom up and over the top. The goal is to keep as much of that precious air in the batter as possible.
Use the Right Pan
You can’t make homemade angel food cake if you don’t have an angel food cake pan. That’s the long and the short of it.
A classic, ungreased angel food cake pan with a removable bottom gives the batter something to cling to so it can climb high. And whatever you do, don’t grease the pan! The cake needs that traction. The hole in the middle isn’t just for looks; it helps the cake bake evenly from the center out.

Turn that Cake Upside Down
Here comes the craziest-sounding part: the moment your cake comes out of the oven, you have to flip it upside down to cool. It’s the trust fall of baking! Most angel food cake pans have handy little feet for this, but if not, balancing the center tube over a bottle neck works perfectly. This step is what prevents the cake from collapsing on itself, keeping it tall and airy. And don’t worry: your beautiful cake won’t fall out of the pan—if you made sure NOT to grease it, that is.
Frequently Asked Questions (FAQ)
- Can I use a Bundt pan? I really wouldn’t risk it, and here’s why: Bundt pans are usually non-stick and have lots of nooks and crannies. The cake batter needs to cling to the sides of the pan to get its height, and it will just slide down a non-stick surface.
- Help! I’m out of cake flour. Don’t panic: you can make a pretty good substitute at home. For every cup of all-purpose flour your recipe calls for, scoop out two tablespoons of the flour and replace it with two tablespoons of cornstarch. Whisk it together really well, and you’re good to go.
- What should I do with all these leftover egg yolks? Leftover yolks are your ticket to another delicious project. They’re perfect for making an irresistible hollandaise sauce, plump gnocchi, homemade gelato, chocolate pots de crème, or a chocolate pastry cream, which would be amazing spooned over this cake.
- How should I store my angel food cake? Keep it in an airtight container on the counter. It should stay fresh and lovely for about 3 days.

How to Serve Homemade Angel Food Cake
Angel food cake is a dream all on its own, but if you want to get fancy, here are some of my favorite ways to serve it:
- The Classic: A big dollop of soft whipped cream and a tumble of fresh berries. It never fails!
- The Indulgent: A slow drizzle of warm chocolate sauce or butterscotch sauce and some toasted almonds or hazelnuts.
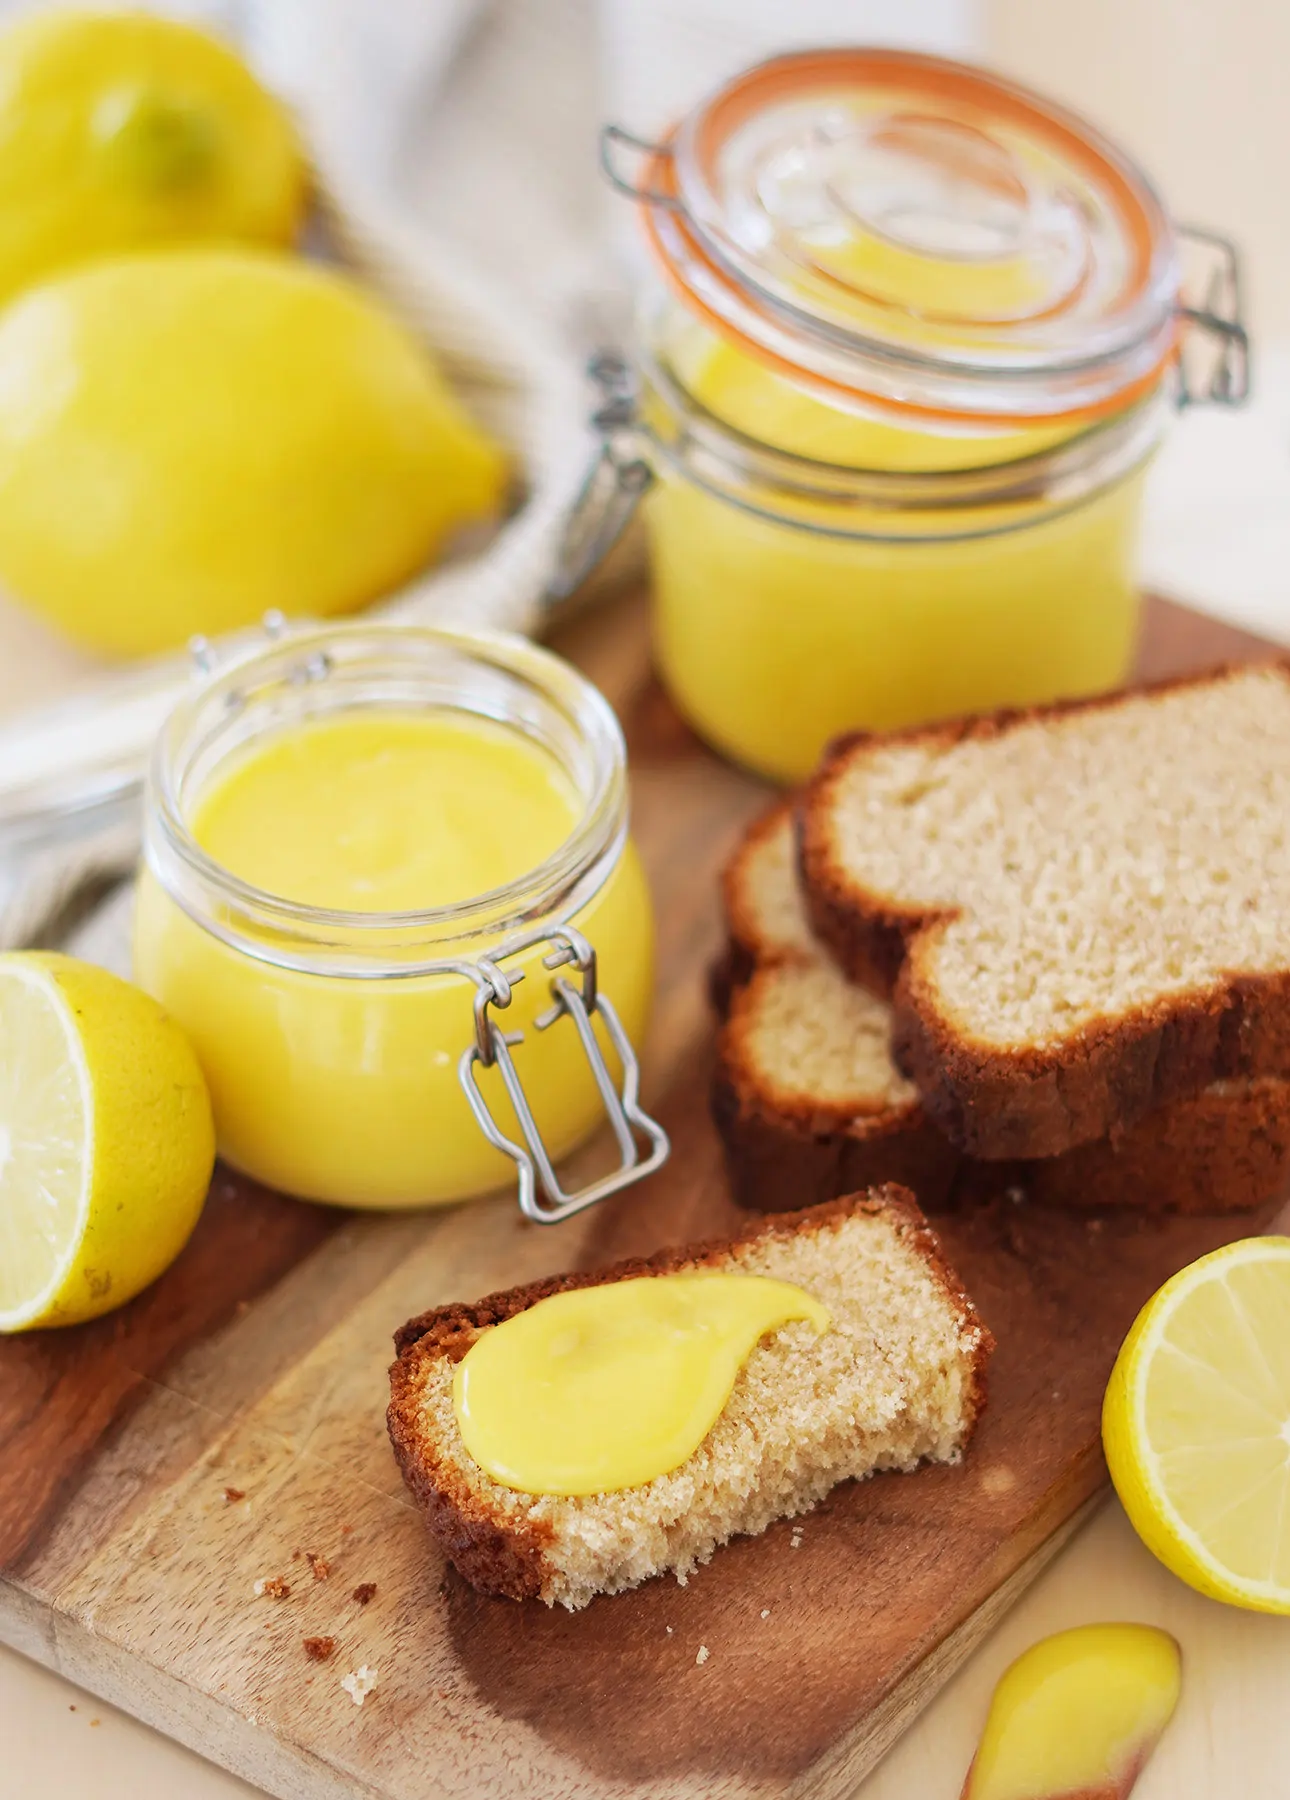
- The Zesty: A spoonful of bright, tart lemon curd to cut through the sweetness. Sprinkle with chopped pistachios for a pop of color. Absolutely divine!
- The Breakfast Treat: Top with full-fat vanilla Greek yogurt, fresh fruits, and nuts.
Step-by-Step Instructions
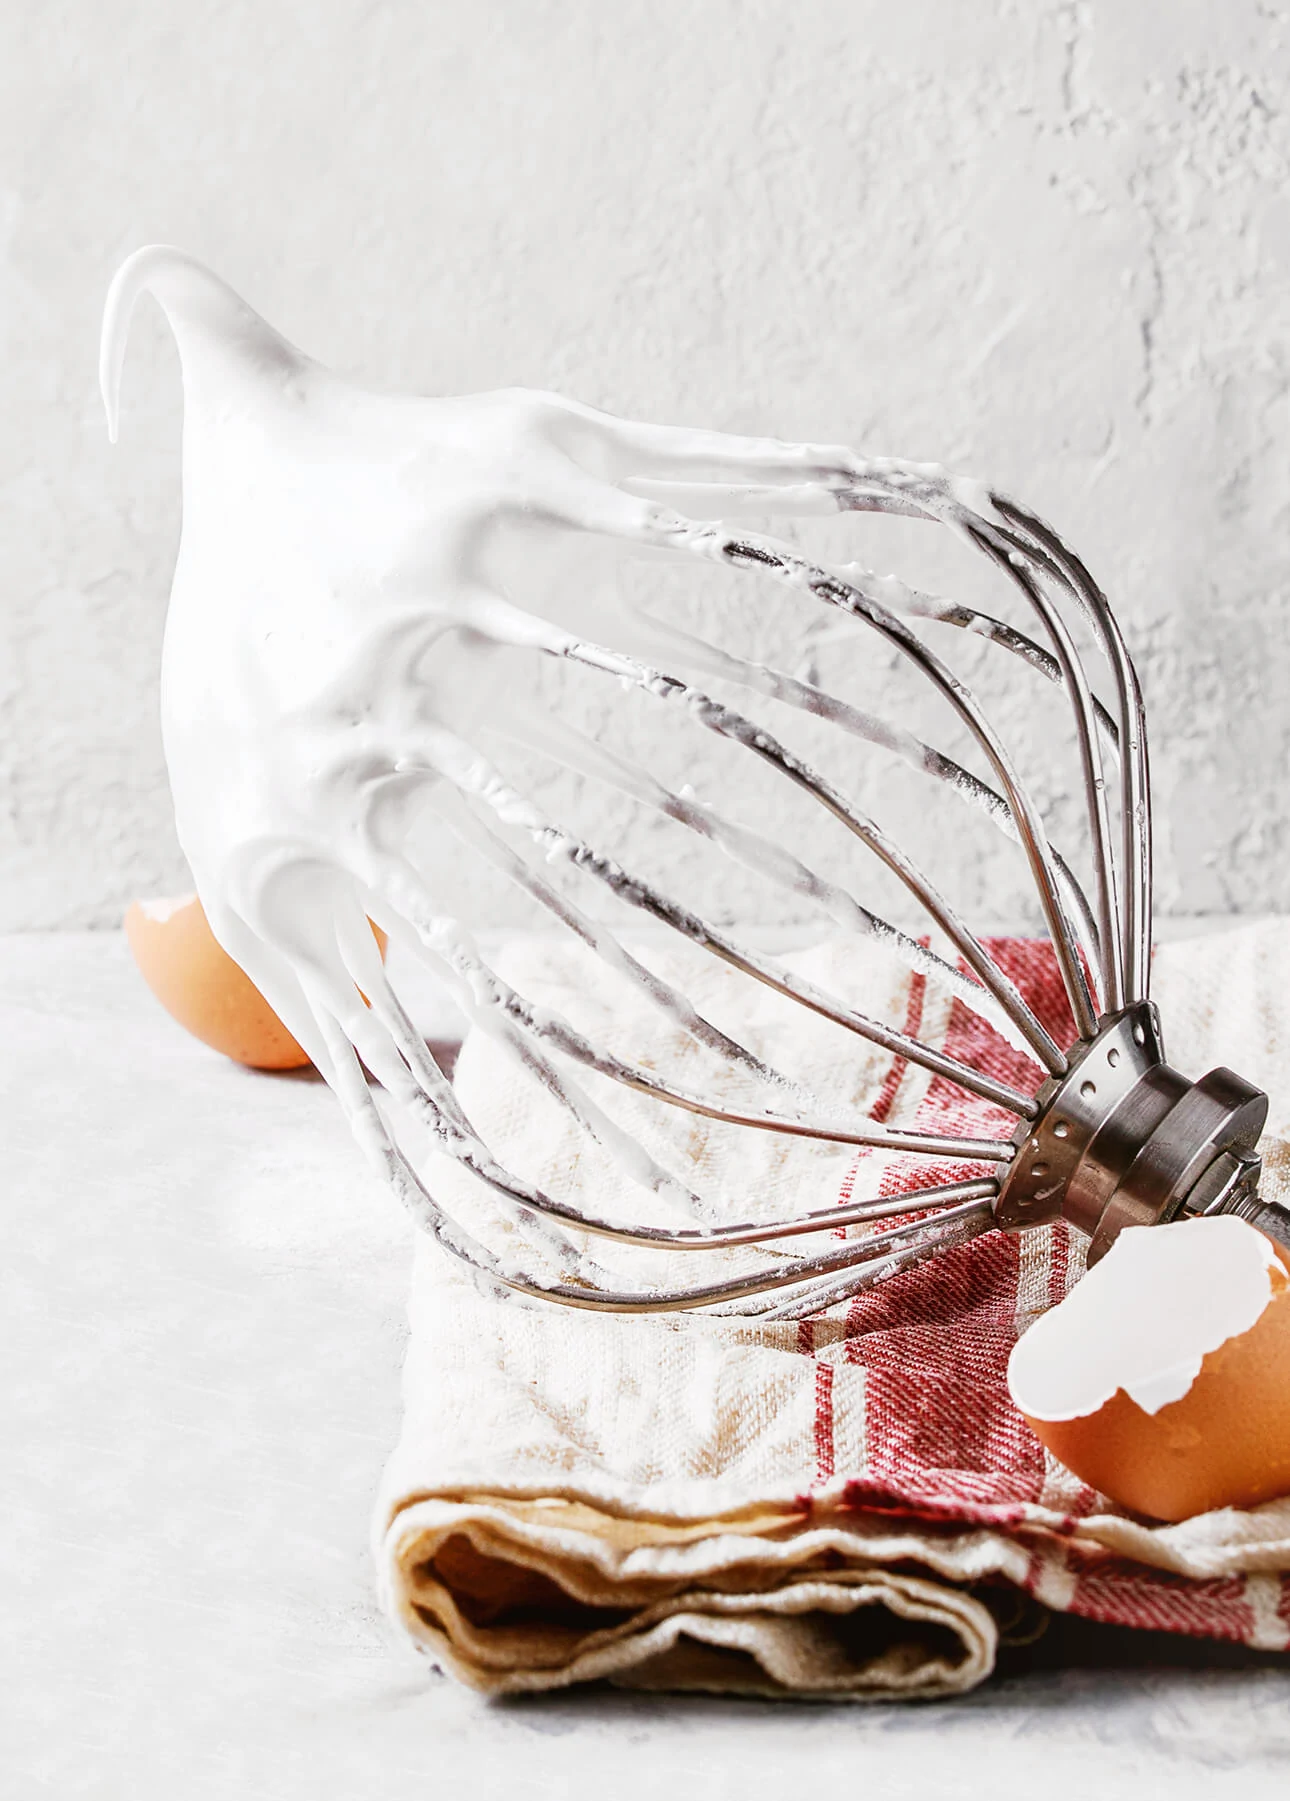
1. In the bowl of a stand mixer fitted with the whisk attachment (or in a large stainless steel mixing bowl, if you’re using a hand mixer), measure the egg whites and whisk until foamy.

2. Add the cream of tartar and beat until soft peaks form.

3. Keep on beating, adding the sifted powdered sugar a couple of tablespoons at a time, until all the sugar is incorporated and stiff peaks form.

4. Add the vanilla extract or lemon zest and fold to incorporate. If you’re using a stand mixer, remove the bowl from its stand.

5. Using a spatula, gently fold in the sifted flour in four batches by repeatedly cutting the spatula in the center of the mixture then coming up the sides.

6. Transfer the mixture into an UNGREASED tube cake pan with a removable bottom. Even out the top of the cake.

7. Bake for about 30 minutes or until the cake is golden and a toothpick inserted in the cake comes out clean. Invert the pan onto a wire rack or onto its feet and let the cake cool completely.

8. To unmold the cake, run a sharp knife around the inside of the pan, then lift the center part with the cake sitting on it. Run the knife around the center part of the cake and along the bottom to loosen it, then remove the tube part of the pan and set the cake onto a serving plate or cake stand.


Homemade Angel Food Cake
Ingredients
- 12 large egg whites, or 1 ½ cups (375 ml) liquid egg whites (see notes)
- 1 tsp cream of tartar
- 1¼ cups powdered sugar, sifted
- 1 tsp pure vanilla extract, or the finely grated zest from 1 lemon
- 1 cup cake flour, sifted (see notes for substitution option)
Instructions
- Preheat the oven to 375°F (180°C).
- In the bowl of a stand mixer fitted with the whisk attachment (or in a large mixing bowl, if you’re using a handheld mixer), measure the egg whites and whisk until foamy.
- Add the cream of tartar and beat until soft peaks form.
- Keep on beating, adding the sifted powdered sugar a couple of tablespoons at a time, until all the sugar is incorporated and stiff peaks form.
- Add the vanilla extract or lemon zest and fold to incorporate. If you’re using a stand mixer, remove the bowl from its stand.
- Using a spatula, gently fold in the sifted flour in four batches by repeatedly cutting the spatula in the center of the mixture then coming up the sides.
- Transfer the mixture into an UNGREASED tube cake pan with a removable bottom. Even out the top of the cake.
- Bake for about 30 minutes or until the cake is golden and a toothpick inserted in the cake comes out clean. Invert the pan onto a wire rack or onto its feet and let the cake cool completely.
- To unmold the cake, run a sharp knife around the inside of the pan, then lift the center part with the cake sitting on it. Run the knife around the center part of the cake and along the bottom to loosen it, then remove the tube part of the pan and set the cake onto a serving plate or cake stand.
- SERVING: Always wait to garnish homemade angel food cake right before serving to make sure it stays fresh.
- TOPPING IDEAS: A big dollop of soft whipped cream and a tumble of fresh berries.A slow drizzle of warm chocolate sauce or butterscotch sauce and some toasted almonds or hazelnuts.A spoonful of bright, tart lemon curd to cut through the sweetness. Sprinkle with chopped pistachios for a pop of color.Top with full-fat vanilla Greek yogurt, fresh fruits, and nuts.
- STORAGE: Store homemade angel food cake under a cake dome, in a large airtight container, or carefully wrapped in plastic. The cake keeps at room temperature for up to 3 days.
Video
Notes
- If you don't have cake flour on hand, you can make some at home. For every cup of all-purpose flour your recipe calls for, scoop out two tablespoons of the flour and replace it with two tablespoons of cornstarch. Whisk it together really well, and you’re good to go.
- Instead of separating eggs yourself, you can use egg whites sold in a carton (such as NatureEgg Simply Egg Whites or Egg Beaters All Natural 100% Egg Whites).
Did you make this?
Tell me how you liked it! Leave a comment or take a picture and tag it with @foodnouveau on Instagram.
Disclosure Notice: This site is a participant in the Amazon Associates Program, an affiliate advertising program designed to provide a means for the site to earn fees by linking to Amazon and affiliated sites.
If you click on an affiliate link, I may earn advertising or referral fees if you make a purchase through such links, at no extra cost to you. This helps me create new content for the blog, so thank you! Learn more about advertising on this site by reading my Disclosure Policy.
Author: Marie Asselin
I’ve never made an Angel Food Cake before but your extremely helpful post makes me think I need to try soon! Gorgeous photos!
Angel food cake is magic. Adding on roasted strawberries (a first for me, I’ll have to try that!) is genius and would highlight the lightness of the rest of the dessert, I imagine. Amazing recipe, Marie!
Stunning cake! I always loved angel food cake as well and think it is just about the best cake in the world. I have never had it with roasted strawberries and I bet it is delicious! Beautiful photos as well.
I’m very nearly at a loss for words here (which isn’t something that happens often).
This is basically perfection. I too adore the light, ethereal texture and taste of angel food, and it goes SO well with cooked (roasted!!) fruit. I’ve been wanting to try making one for a long time, but I’ve never bitten the bullet. As luck would have it, I just got a nice pan like the one you used, so maybe it’s time to give it a go. Seriously, beautiful job.
I love angel food cake. It is so versatile but I enjoy it with berries the most. It’s been years since I’ve made a homemade one. That is going to change. Thank you for sharing.
This cake is gorgeous Marie! I bet it’s delicious!
You bet it is! :)
I’ve actually been looking for a good angel food cake recipe so this is very timely :) And I love how you’ve decorated it with the berries
Happy to help! And berries are clearly the angel food cake’s best friends <3