- V
- GF
- NS
- DF
- View Recipe Key
How to Make Salted Caramel Cream Puffs
How to Make Salted Caramel Cream Puffs

These dreamy salted caramel cream puffs will turn you into a baking superstar and make your loved ones ask for more. Learn how to plan ahead and achieve this totally doable baking project!
This post contains affiliate links. Full disclosure is at the bottom of the article.
I firmly believe cream puffs can be one of the most delicious joys in a food lover’s life. If you’ve had a freshly prepared cream puff, you know what I’m talking about. The tiny format, the irresistibly crunchy shell, the sweet filling that bursts all over the place when you take a bite and forces you to lick the cream off your fingers… all these tiny things add up to what makes cream puffs so unforgettable.
Unfortunately, because of so many factors, including even staffing challenges and work schedules, the cream puffs you buy in pastry shops or even in restaurants are way too often prepared in advance and stored for days before you get to enjoy them. This means the cream puff shells are inevitably soft and sometimes humid, not crunchy as they should be. If you’ve never enjoyed cream puffs any other way, you can’t know what you’re missing. But if you’re a pastry nerd like me, you’re disappointed with every bite.
In a perfect pastry world, cream puffs would be prepared à la minute, that is, upon order. All the components can be made in advance, which means a cream puff can be assembled within seconds before serving. I know of one pastry shop that does this—and it is, incidentally, my favorite pastry shop in Québec—Patrice Pâtissier in Montreal. This pastry shop is renowned for many things, but they really do take cream puff making to a whole other level. The shop has the one cream puff du jour displayed under a glass dome, and if you order one, you must wait for a few minutes while a chef assembles it just for you. Believe me, biting into such a carefully prepared puff is pretty life-changing. But it’s sad in a way because the vast majority of the cream puffs you’ll have after this one will be disappointing! (First-world problems, I know.)
View this post on Instagram
Needless to say, preparing cream puffs to order requires a level of commitment and love for the treat that not every shop or restaurant has or can afford. But I’ve got good news for you: making cream puffs at home gives you all the pleasure of that freshly prepared cream puff, with the added pride of knowing you’ve made them yourself.
And I’ve also got great news for you: cream puffs are a project you need to carve out time for, yes, but making them doesn’t involve frustrating pitfalls or complicated techniques. It’s a straightforward process you can achieve even if you’re not an experienced pastry maker. And the final, wonderful news is that once you’ve learned how to make choux pastry, you’ll be able to make so many other delightful treats: chocolate éclairs, cheese puffs (gougères), and so many more French classics will now be within reach.
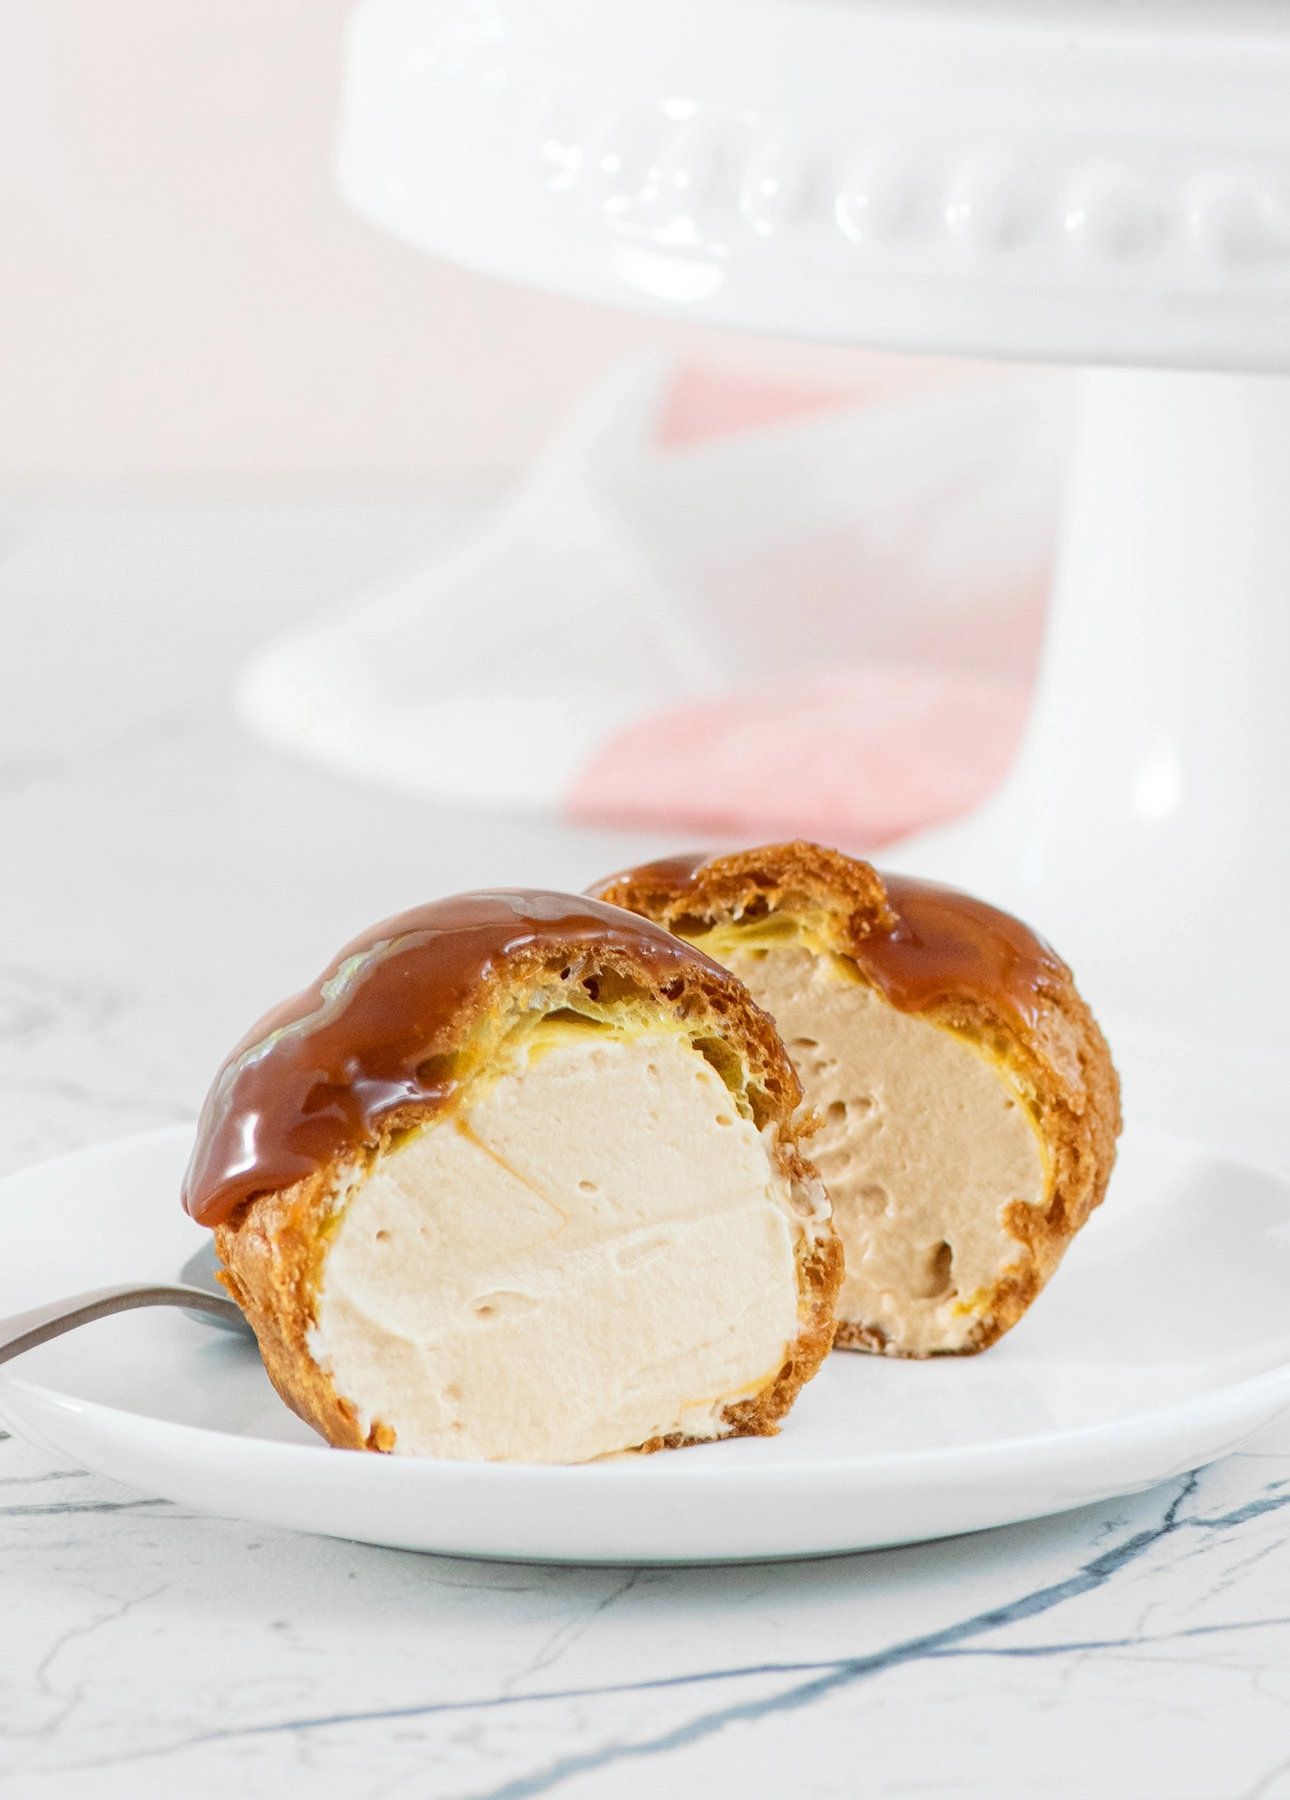
These Salted Caramel Cream Puffs might very well be the very best dessert I’ve ever created. Don’t just take my word for it: everyone who’s tasted these bite-sized masterpieces has sighed this same statement in delight, all while cleaning every last drop of that addictive salted caramel sauce off their plates. And the next question is always, “Can I have another one?”
A few components are involved in making these cream puffs, but most of them can be prepared in advance over several days, which allows you to break down the process and make it more approachable. (Refer to my printable preparation plan below to get started.)
Making these Salted Caramel Cream Puffs also means you’ll be making salted caramel twice: once to incorporate in the whipped cream filling and a second time to produce that irresistible, glistening sauce. Though making caramel from scratch might sound intimidating, don’t worry, I’ll walk you through it—you don’t even need a thermometer to make it, either!
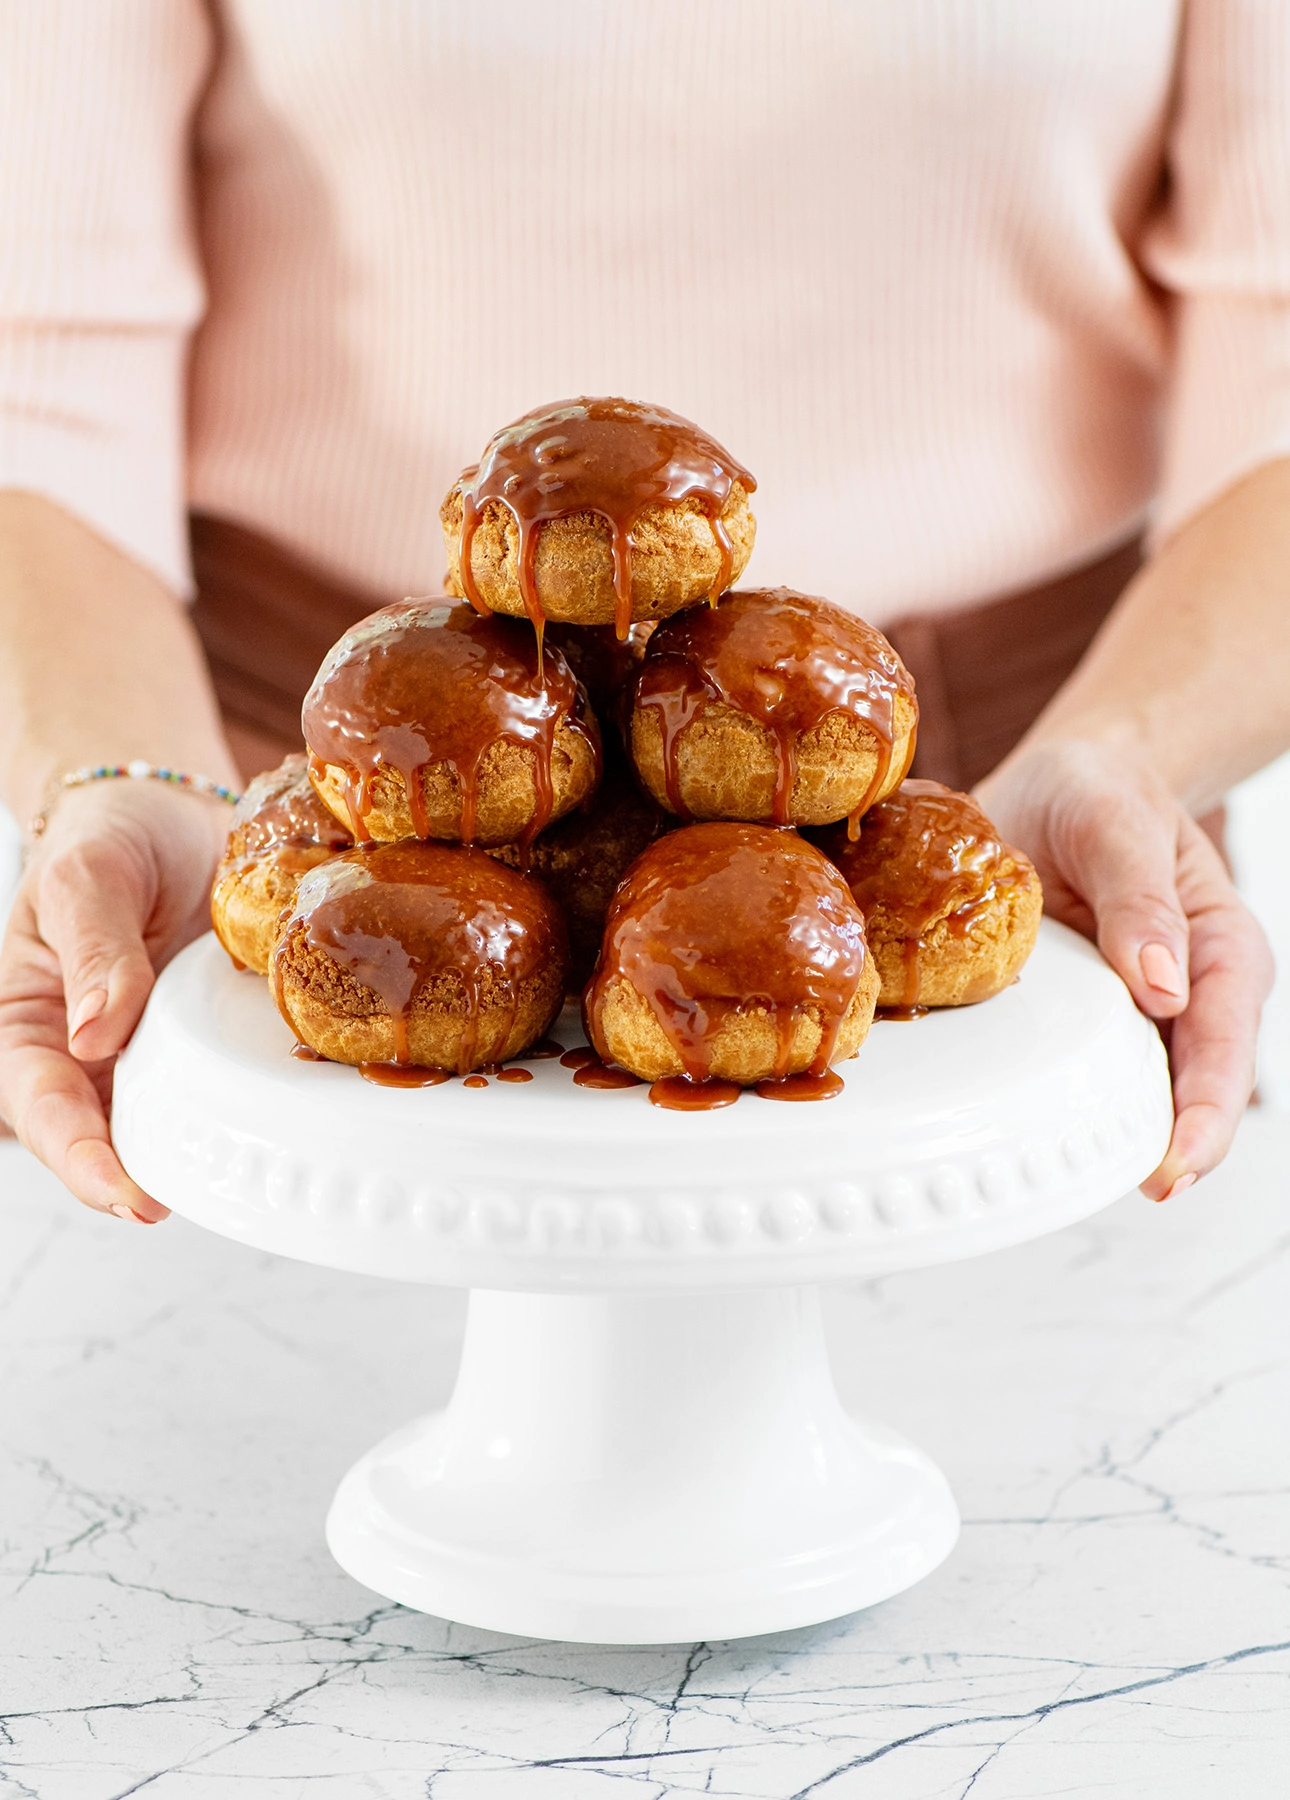
I believe these Salted Caramel Cream Puffs could become the most spectacular dessert you’ve ever made, too. To serve, you can set them on a beautiful plate or pile them high as a quasi-croquembouche. However you choose to serve these cream puffs, you’re sure to create an impression!

I’ve never made caramel from scratch! Is it stressful or difficult? Can I mess it up?
The biggest pressure point when making caramel is knowing when to take it off the heat. Cook caramel a few seconds too long and you’ll burn it. The good news is that caramelizing the sugar is the very first step, so if you mess it up, you can simply start over without spoiling other ingredients.
With practice, you’ll know exactly when your caramel is ready. The more caramel caramelizes, the more it develops savory notes, which is what makes it so irresistible. My recipe for these Salted Caramel Cream Puffs requires you to make a dry caramel; that is, you’ll be cooking that sugar without any other liquid involved. This requires you to whisk throughout and to keep a constant eye on the process, which is key to caramel success.
You should pull caramel off the heat a few seconds before you think it’s ready. That’s because the caramel will keep cooking and getting darker even for the few seconds that elapse before you whisk in the heavy cream, which stops the caramelization process.
If this is your first time making caramel, you should pull the sugar off the heat when it has the color of light maple syrup or golden corn syrup. Pulling the sugar off too early is better than too late because the worst thing that will happen is that your caramel will have a milder flavor. With experience, you’ll dare to keep the caramel on the heat for just a few more seconds to bring it right to that savory edge and create a life-changing caramel you’ll become addicted to.
Do I need a candy thermometer to make salted caramel sauce?
No, you don’t need a thermometer to make either the salted caramel cream or the salted caramel sauce required in this cream puff recipe! Refer to the detailed instructions below to learn how to make salted caramel sauce without using a candy thermometer.
Why is gelatin added to the salted caramel whipped cream filling?
Adding gelatin to whipped cream creates stabilized whipped cream, a pastry term that simply means your whipped cream will remain firm and fluffy for up to 24 hours. Stabilizing—or adding gelatin to—whipped cream also means it won’t “weep,” that is, release water that would wet your precious cream puff shells.
Making stabilized whipped cream is super easy: all you need to do is to melt a bit of gelatin into water, then mix this into the salted caramel cream mixture before whipping. Refer to the recipe below for detailed instructions.
Can I omit gelatin from the salted caramel whipped cream filling?
If you plan to assemble the cream puffs and serve them within 2 hours, you can omit the gelatin. The salted caramel whipped cream won’t have time to change texture within such a short timeframe.
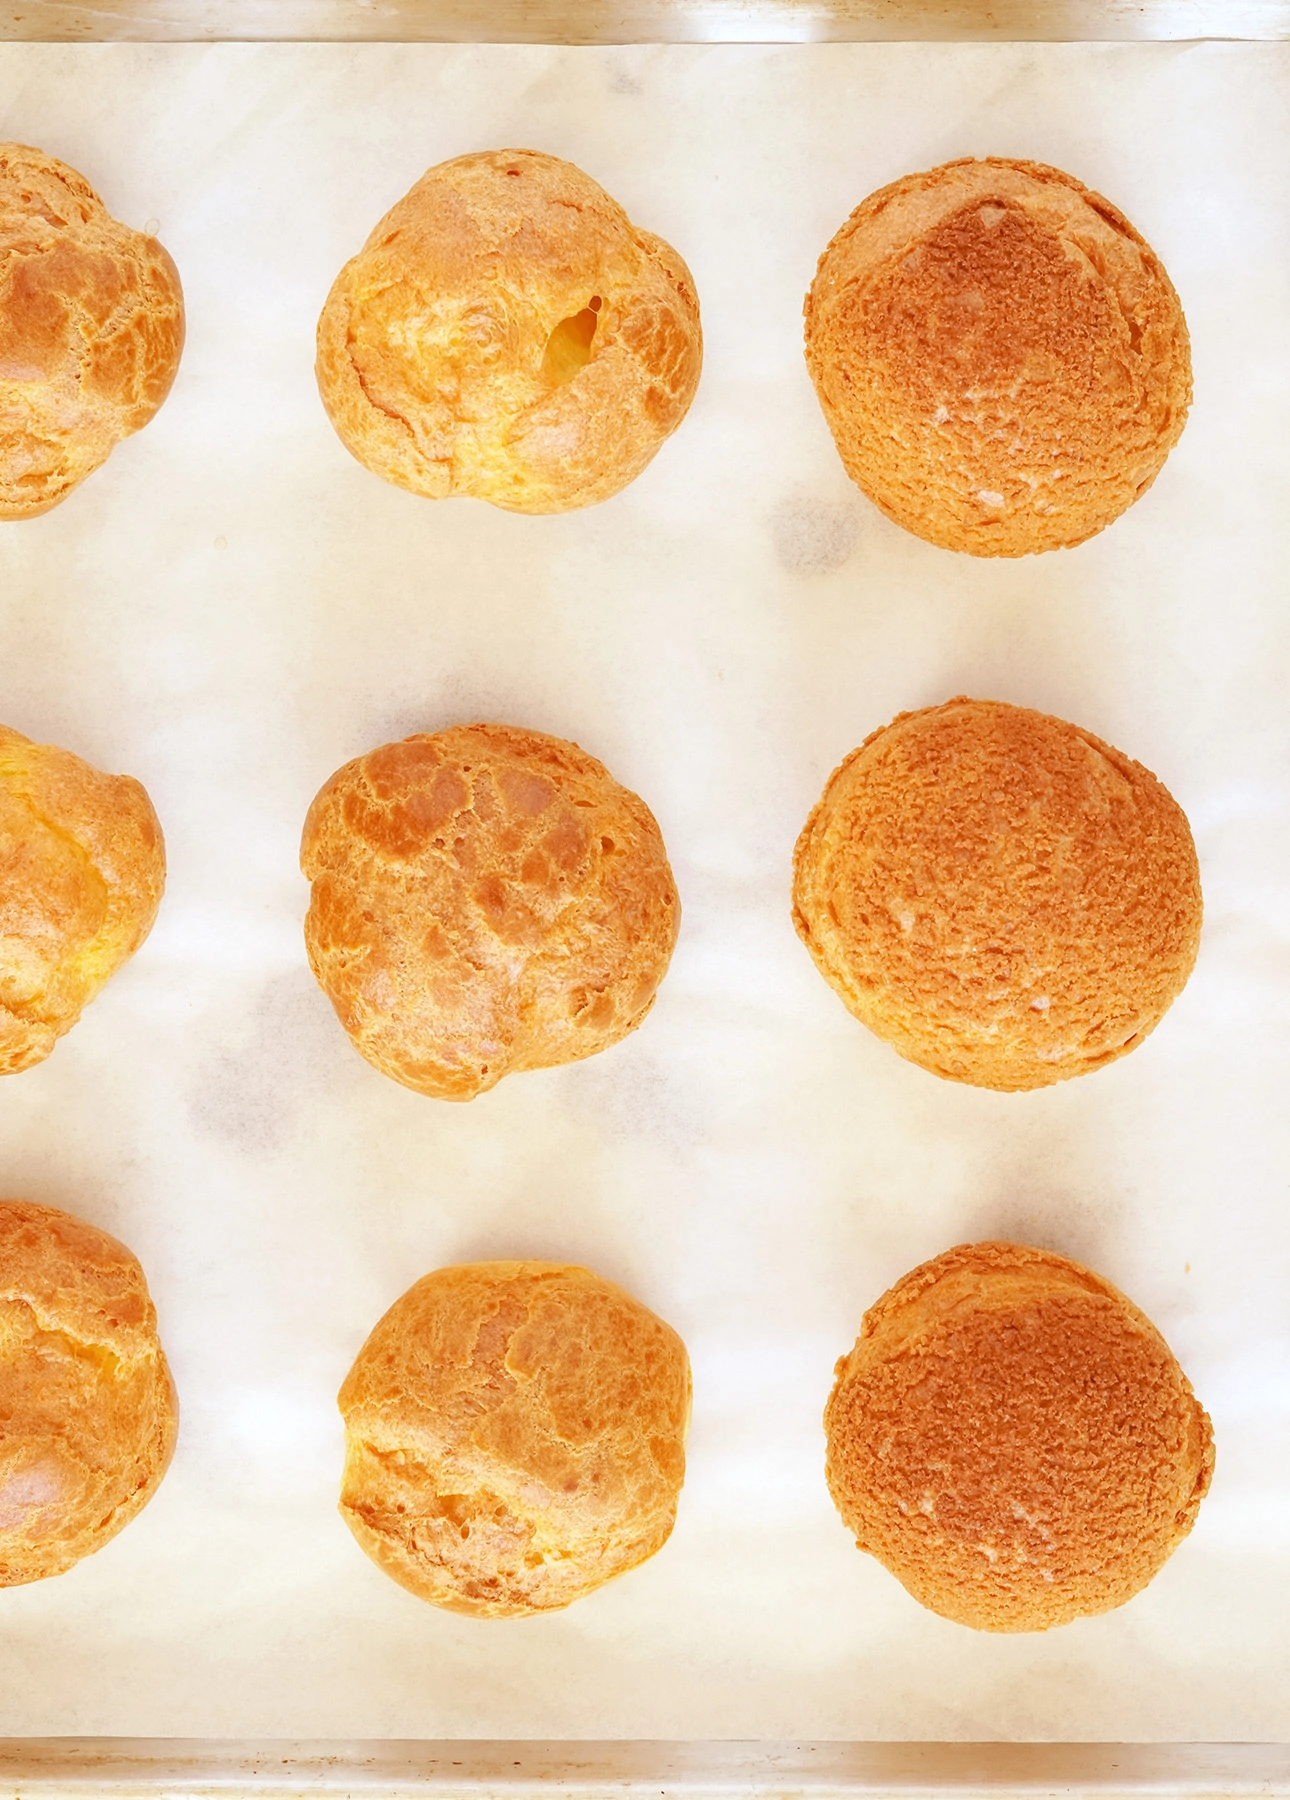
What is choux craquelin, and why is it useful?
Choux craquelin is a simple dough made of butter, brown sugar, and flour. This dough is then rolled thin and cut out into rounds that are then placed over the cream puffs right before baking.
Essentially, craquelin helps creating rounder, more uniformly shaped cream puffs. The way it works is that the butter in the mixture melts and “fries” the top of the puffs, which controls the development of the puffs during baking. This creates perfectly round cream puffs.

Do I really need to use craquelin to make these salted caramel cream puffs?
No, you don’t. Though making craquelin isn’t difficult at all, it is the kind of “next-level” technique you can skip over if this is your first time making cream puffs or if you don’t mind if your cream puffs are perfectly imperfect.
Why must choux craquelin be frozen?
Quite simply, craquelin dough is very soft and difficult to handle at room temperature. Freezing craquelin also slows down its melting process during baking, allowing the cream puff to fully puff up to its beautiful potential.
What size should cream puffs be?
Cream puffs can basically be any size you want. These Salted Caramel Cream Puffs are generously sized and can be eaten in 2 to 3 (messy) bites. You can of course create smaller, one-bite cream puffs: simply make sure to decrease the baking time accordingly.
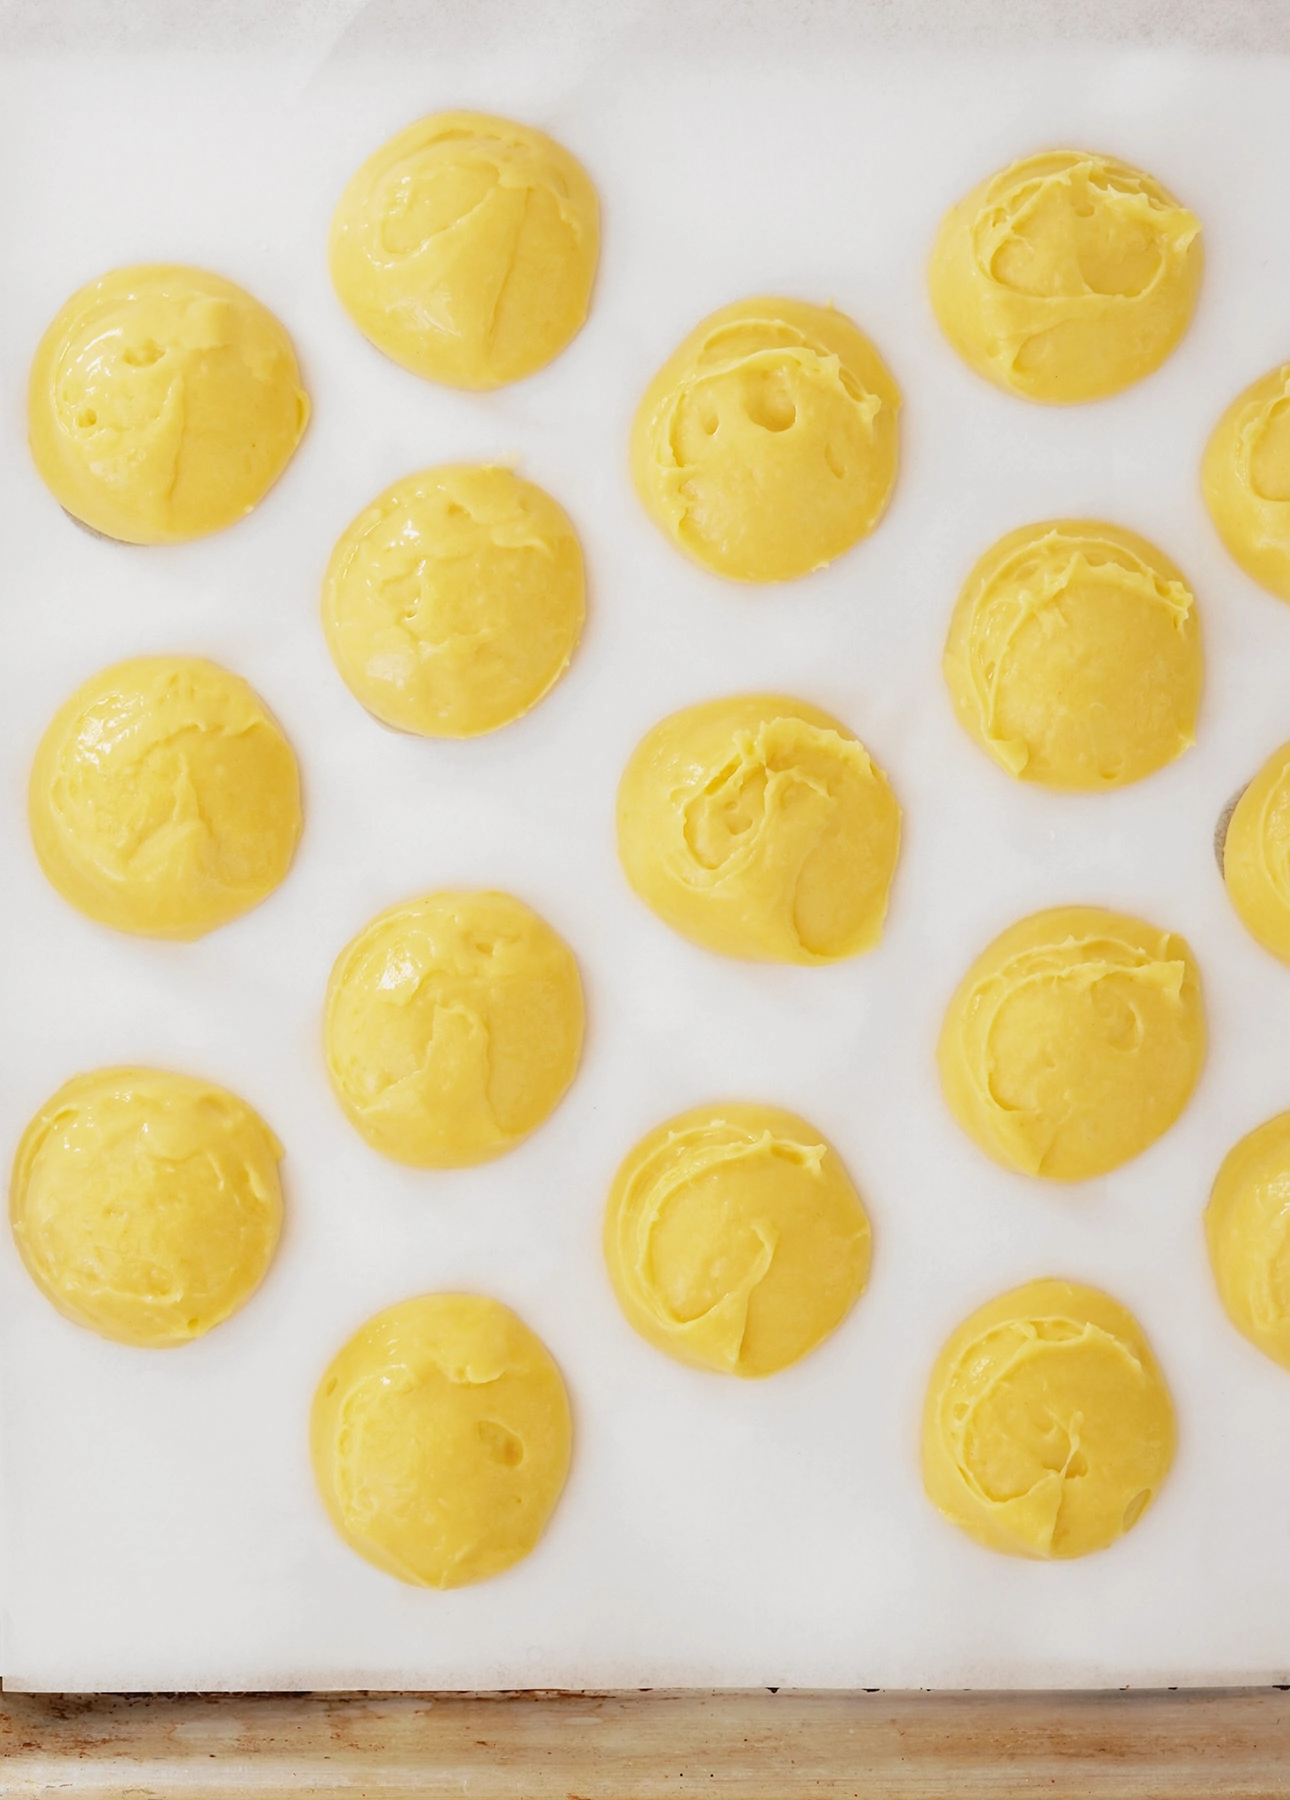
How to portion cream puffs more quickly (and create uniformly sized cream puffs)
My favorite hack to create perfectly sized cream puffs in a snap is to use a cookie scoop. This tool allows you to easily control the amount of dough you use and quickly creates cream puffs that are exactly the same size.
This recipe for Salted Caramel Cream Puffs uses a ¾ oz (1 ½ tbsp) cookie scoop.
How to know when cream puffs are baked through
Cream puffs are baked through and ready to come out of the oven when they’re dark golden brown all around—that is, down to the bottom of the puff. This tends to take longer than you might expect; cream puffs might look perfectly puffed and golden after 20 minutes; but if the base is still blonde when you pull the puffs out of the oven, they will likely collapse while cooling instead of retaining their beautiful round shape.
Can cream puffs be made in advance?
Cream puffs that have been filled with caramel whipped cream and dipped into salted caramel sauce should be enjoyed within an hour or two. The cream puff shell will start softening past that, and you’ll slowly but surely lose that irresistible contrast between the crispy shells and the creamy center.
However, most of the cream puff components can be prepared in advance; the cream puff shells can even be frozen! This means you will only need to do the final assembly shortly before serving. This spreads the work over time, makes the project more approachable, and removes all the pressure from the project. If one of the components doesn’t work exactly how you expected it to, you won’t feel like you’ve spoiled tonight’s dessert! You can simply start over and get everything ready before the big day.
Can cream puffs be frozen?
Both craquelin and cream puff shells can be frozen.
Preparing craquelin in advance means you’ll save some time when comes time to bake the shells. Cut-out rounds of craquelin can be kept frozen for up to 1 month. (Refer to the recipe below for detailed freezing tips.)
The baked cream puff shells can also be frozen for up to 1 month. Bake the shells as indicated, then let them cool to room temperature. Place all the cream puff shells on a baking sheet, then place the sheet in the freezer for at least 3 hours or overnight.
Once the shells are frozen hard, gently transfer them to an airtight container (the frozen shells are very fragile and can break easily if they’re not handled with care.) You can keep cream puff shells frozen for up to 1 month.
How to return frozen cream puff shells to their freshly baked glory
Thawed cream puff shells will be soft and sad. To return thawed cream puff shells to their freshly baked flavor and texture, preheat the oven to 325°F (160°C). Place the cream puff shells on a baking sheet. Bake for 7 minutes, then transfer to a wire rack and let cool completely to room temperature. (This will return the cream puff shells to their crisp, freshly baked state.) Proceed with filling the cream puffs as indicated in the recipe below.

Preparation plan for making Salted Caramel Cream Puffs
SAVE A PDF COPY / PRINT THIS PREP PLAN
Up to 1 month in advance:
- Make the choux craquelin, and freeze it.
- You can also bake the cream puff shells and freeze them for up to 1 month. Refer to the recipe below for detailed freezing tips.
Up to 2 days in advance:
- Make the salted caramel whipped cream filling. (The cream needs to be cold before whipping.)
- Make the salted caramel sauce and refrigerate.
Morning of:
- Make the choux pastry.
- Bake the cream puffs and cool completely.
- Whip the salted caramel whipped cream filling and refrigerate.
Up to 4 hours before serving:
- Fill the cream puffs with the salted caramel whipped cream filling and refrigerate, uncovered.
- Bring the salted caramel sauce back to room temperature.
Up to 1 hour before serving:
- Reheat the salted caramel sauce for a few seconds in the microwave or in a saucepan over low heat, just to loosen it a bit, then transfer to a small bowl.
- Dip the tops of the cream puffs in the salted caramel sauce.
- Transfer the cream puffs to a cool spot and keep at room temperature until serving.
- ENJOY!
Choux Pastry Video Class

Never made pâte à choux before? In my detailed video class, you will learn how to make pâte à choux, and then discover how to turn this one dough into chouquettes, cream puffs, profiteroles, éclairs, and gougères, or savory cheese puffs. Along the way, I’ll provide helpful tips to help you be successful on your first try, and demonstrate many variation ideas. My fun class will quickly allow you to master a new skill, that will in turn allow to create impressive puffed treats. Watch now!
Check out the class trailer for a sneak peek into what you’ll learn in the class:

RECIPE: Salted Caramel Cream Puffs
Ingredients
For the salted caramel whipped cream filling
- 2 tbsp water
- 1 tsp powdered gelatin
- 2 cups heavy cream (35% m.f.)
- 1 cup granulated sugar
- ½ tsp fleur de sel, or fine sea salt
For the salted caramel sauce
- ½ cup heavy cream (35% m.f.)
- 1 cup granulated sugar
- ½ tsp fleur de sel, or fine sea salt
For the choux craquelin
- ¼ cup butter, room temperature
- ¼ cup brown sugar
- ½ cup all-purpose flour
For the choux pastry
- ½ cup milk
- ½ cup water
- ½ cup unsalted butter (1 stick), cut into cubes
- ½ tsp kosher salt, or fine sea salt
- 1 cup all-purpose flour
- 4 large eggs
Instructions
- For the salted caramel whipped cream filling: Pour the water in a small bowl. Sprinkle the gelatin over the water, do not stir but leave to rest while you prepare the caramel.
- In the microwave or in a saucepan, warm the cream without boiling. Keep close to the stove where you’ll be preparing the caramel.
- In a medium saucepan, add the sugar. Place over medium-high heat and stay close: you need to keep an eye on the sugar melting. After 3 minutes, use a whisk to poke around and see how far along the sugar is. When you feel like the bottom of the sugar is loose and liquid, start whisking. The sugar will first get into clumps, but these will melt as the sugar heats up.As you whisk, the sugar will fully melt then turn amber as it caramelizes. When the sugar is about the color of maple syrup, take it off the heat, and immediately whisk in about ½ cup of the warm cream into the caramel. Keep your head back and hold your hand high on the whisk while you do because the caramel will produce hot steam. Slowly whisk in the remaining cream, then whisk in the gelatin mixture and the salt.
- Strain the caramel cream into a large cup or a bowl and leave to cool to room temperature. Cover and refrigerate for at least 6 hours, or ideally overnight. (The caramel cream needs to be very cold before whipping.) You can prepare the caramel cream up to 2 days in advance, but you will only whip it a few hours before using.
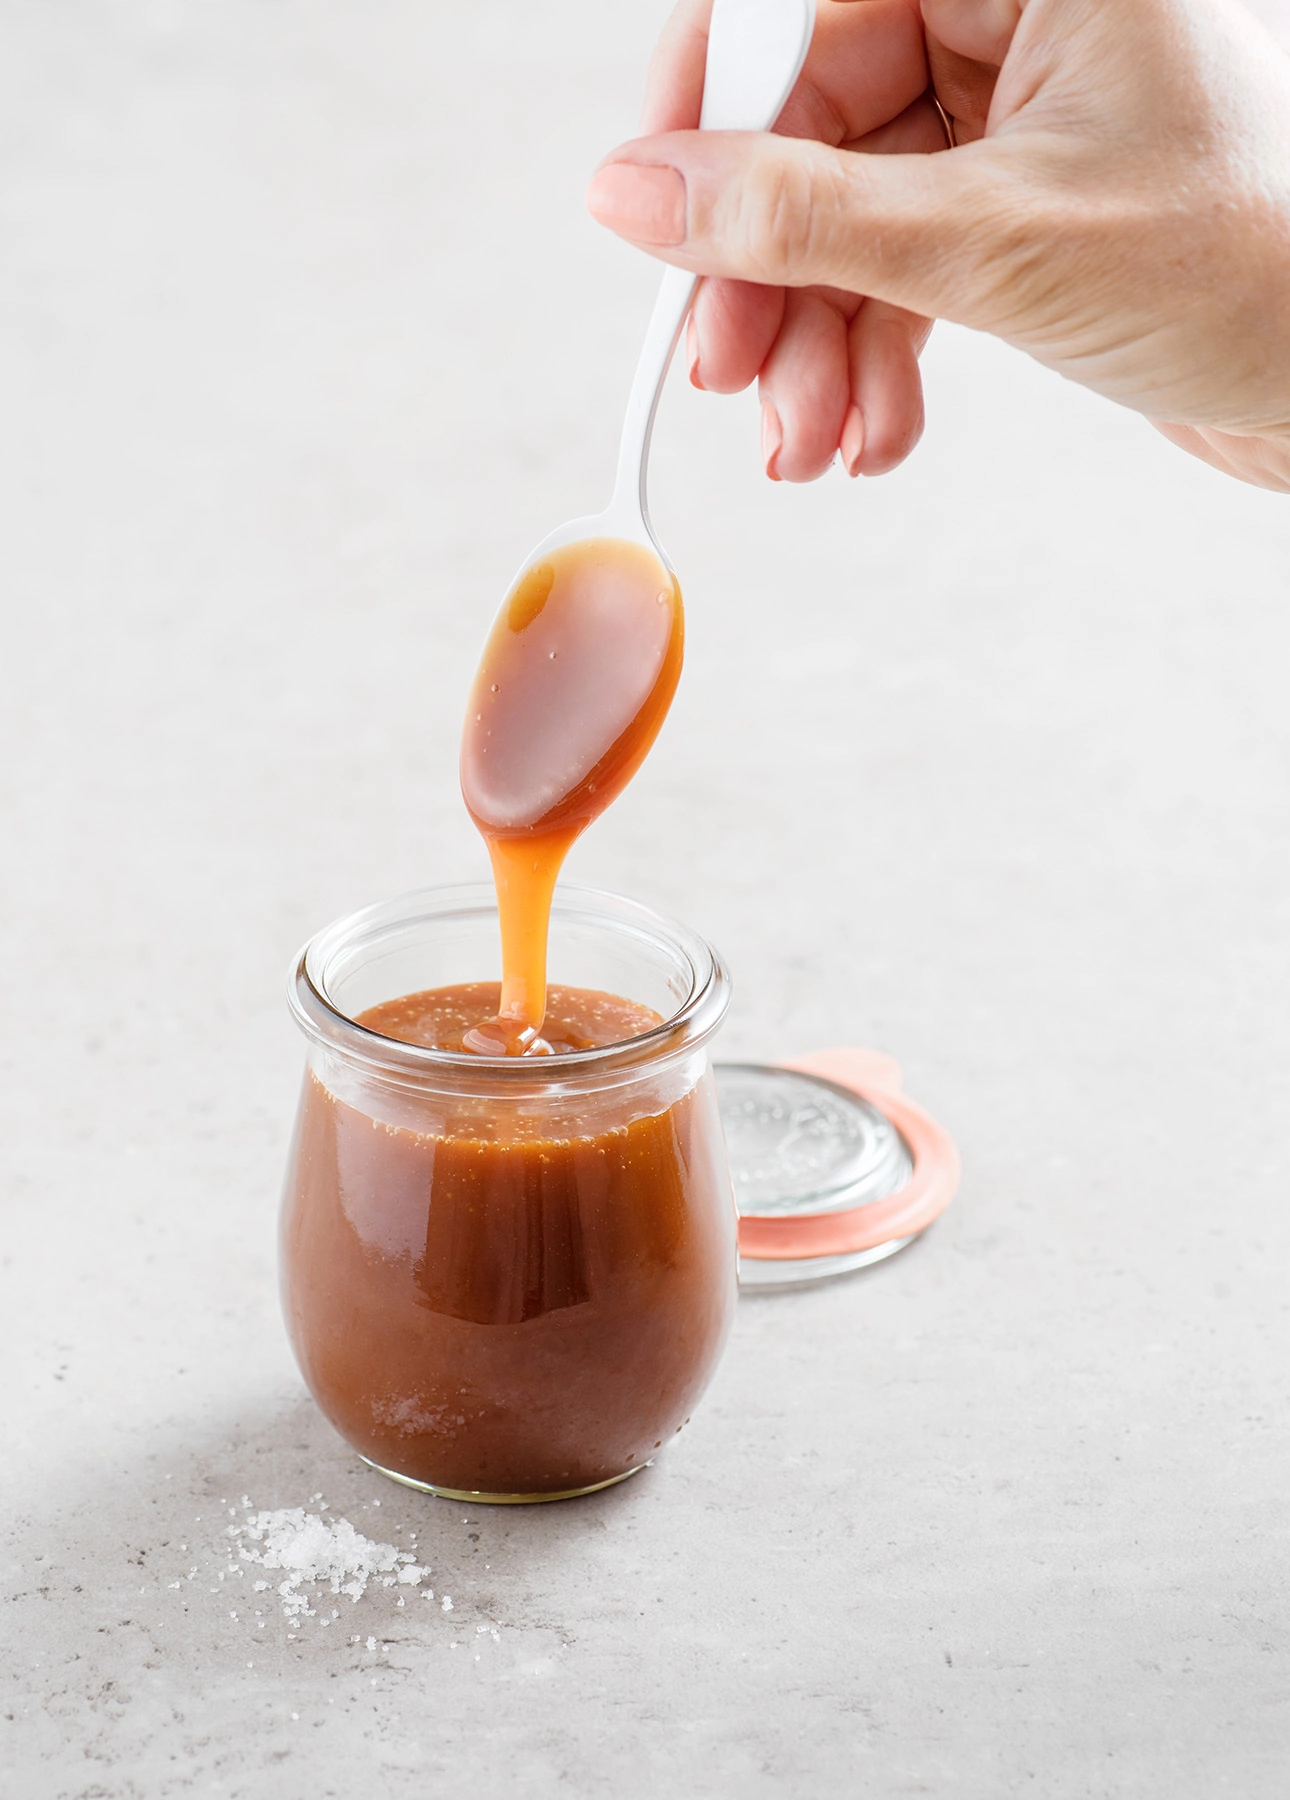
- For the salted caramel sauce: The process to make the salted caramel sauce is very similar to that of the salted caramel whipped cream filling.
- In the microwave or in a saucepan, warm the cream without boiling. Keep close to the stove where you’ll be preparing the caramel.
- In a medium saucepan, add the sugar. Place over medium-high heat and stay close: you need keep an eye on the sugar melting. After 3 minutes, use a whisk to poke around and see how far along the sugar is. When you feel like the bottom of the sugar is loose and liquid, start whisking. The sugar will first get into clumps, but these will melt as the sugar heats up.As you whisk, the sugar will fully melt then turn amber as it caramelizes. When the sugar is about the color of maple syrup, take it off the heat, and immediately whisk in about half of the warm cream into the caramel. Keep your head back and hold your hand high on the whisk while you do because the caramel will produce hot steam. Slowly whisk in the remaining cream, then whisk in the salt.
- Strain the salted caramel sauce into a glass jar and leave to cool to room temperature. Refrigerate for at least 3 hours. You can make the salted caramel sauce up to 2 days in advance; keep refrigerated until needed.
- For the choux craquelin: In a bowl, beat together the soft butter and brown sugar until fully incorporated. Add the flour and beat just to incorporate. The craquelin dough should have a sticky Play-Doh texture.
- Bring the craquelin dough together into a rough ball. Set over a sheet of parchment paper. Cover with a second sheet of parchment paper. Roughly flatten the dough using the palm of your hand, then use a rolling pin to roll out to a ⅛-in (3 mm) thickness.
- Peel the top sheet of parchment paper off, then use a 1½-in (4 cm) round cookie cutter to indent rounds into the dough (do not try to lift the craquelin rounds at this point.) Transfer the sheet of craquelin dough into the freezer and freeze for at least 1 hour, or up to 2 days.
- Time saving tip: Once the craquelin dough is frozen hard, you can lift the frozen craquelin rounds (use the cookie cutter to fully detach the rounds, if needed) and store them in an airtight container. Separate each layer of craquelin rounds with parchment paper to avoid sticking. The craquelin dough warm up and softens very quickly at room temperature, so you might need to return the dough to the freezer a few times to lift all craquelin rounds. Discard the scraps. Keep the craquelin rounds frozen until needed.
- For the choux pastry: In a medium saucepan, combine the milk, water, butter, and salt. Bring to a boil over medium heat. When the mixture is boiling, add the flour all at once and stir vigorously with a wooden spoon until the mixture pulls away from the sides of the pan. Keep cooking and stirring the mixture over medium heat for about 1 minute to eliminate excess moisture. If you used a stainless-steel saucepan, a thin layer of dough may stick to the bottom and sides of the pan; this is normal. Take off the heat.
- Transfer the dough to the bowl of a stand mixer, or to a large mixing bowl if using a hand mixer, and let cool for 5 minutes, stirring occasionally to allow some of the steam to come out.
- Set the mixer to medium speed, and beat the eggs in one at a time, making sure each egg is well incorporated before adding the next. Scrape down the bowl down between each addition. Every time you add an egg, the dough will separate and look curdled, but it will then come back together in a super sticky, crumbly way. The dough will keep on getting smoother as you add more eggs. The dough is done when it is very thick and stick, but also smooth and elastic.
- Choux pastry can be covered and refrigerated for up to 6 hours (half a day.) You do not need to bring choux pastry back to room temperature before baking.
- To shape the cream puffs: Line a baking sheet with parchment paper.
- If using a cookie scoop to shape the cream puffs: Fill a ¾ oz (1 ½ tbsp) cookie scoop scant with choux pastry, then wipe excess pastry off the sides of scoop (this will create cleaner mounds of dough.) Drop the ball of choux pastry on the prepared baking sheet. Repeat these steps, setting the puffs 3 inches (8 cm) apart to leave plenty of room for expansion. You should be able to fit about 10 cream puffs on a standard half-sheet pan. (Refrigerate the remaining choux pastry between batches.) Using damp fingertips, press down any peaks of dough to create round puffs.
- If using a pastry bag to shape the cream puffs: Fit a large pastry bag with a size 6 (Ateco 806) round pastry tip. (The opening should be ½-in / 1¼ cm.) Fold the top 3 inches (7 cm) of the pastry bag down over itself like a cuff. Using a spatula, scoop and push the choux pastry into the bag. Unfold the cuff and squeeze the bag to push the choux paste toward the tip. Firmly twist the top part of the bag to push the choux pastry down into the tip.
- Hold the bag with the tip perpendicular to the baking sheet. With the tip of the bag touching the sheet, squeeze gently and evenly with one hand, while guiding the tip of the bag with the other. Pipe out mounts of dough about the size of a ping pong ball (1 ½-in / 4 cm). You should be able to fit about 10 cream puffs on a standard half-sheet pan. (Refrigerate the remaining choux pastry between batches.) Using damp fingertips, press down any peaks of dough to create round puffs.
- To bake the cream puffs: Position a rack in the middle position of the oven. Preheat the oven to 400°F (200°C).
- If using, cover each cream puff with a craquelin round. Bake one sheet of cream puffs for about 30 minutes, or until the cream puffs are golden brown all around (if the puffs are light blond at the base, the puffs will collapse upon cooling.) Transfer the baking sheet to a wire rack and leave to cool completely to room temperature, at least 1 hour.
- Repeat the baking steps to prepare all cream puffs. If you have only one baking sheet, you can pull the parchment paper sheet out of the sheet and carefully transfer that to the wire rack for cooling. Run the baking sheet under cold water to cool it down, then line with parchment paper and repeat the steps to bake a second batch of cream puffs.
- How to freeze cream puffs: The cream puff shells can be frozen for up to 1 month. Bake the shells as indicated, then let them cool to room temperature. Place all the cream puff shells on a baking sheet, then place the sheet in the freezer for at least 3 hours, or overnight.
- Once the shells are frozen hard, gently transfer them to an airtight container (the frozen shells are very fragile and can break easily if they’re not handled with care.) Keep frozen for up to 1 month.
- To use frozen cream puff shells: Preheat the oven to 325°F (160°C). Place the cream puff shells on a baking sheet. Bake for 7 minutes, then transfer to a wire rack and let cool completely to room temperature. (This will return the cream puff shells to their crisp, freshly baked state.) Proceed with filling the cream puffs as indicated below.
- To assemble the salted caramel cream puffs: Take the salted caramel cream out of the refrigerator and transfer to a large bowl. Beat the salted caramel cream to firm peaks.
- Fit a large pastry bag with a size 2 (Ateco 802) round pastry tip. (The opening should be ¼-in / 0.6 cm.) Fold the top 3 inches (7 cm) of the pastry bag down over itself like a cuff. Twist the tip of the bag right over the pastry tip (this will prevent the salted caramel whipped cream from spilling out.) Set the pastry bag in a tall glass or measuring cup to keep it upright.
- Using a spatula, scoop and transfer the salted caramel whipped cream into the pastry bag. Unfold the cuff and twist the large end of the bag to close it.
- Use a sharp, pointy knife or a skewer to poke a hole under each cream puff. Pick up the pastry bag with the salted caramel whipped cream. Holding the pastry bag tip size up, gently twist the large end of the bag to push the cream toward the tip. Gently insert the tip of the bag in one cream puff and fill with salted caramel whipped cream. (You’ll know when the cream puff is full when your pastry tip gets pushed out of the puff.) Set the filled cream puff down onto a plate and repeat to fill all cream puffs.
- You can refrigerate the filled salted caramel cream puffs, uncovered, for up to 4 hours.
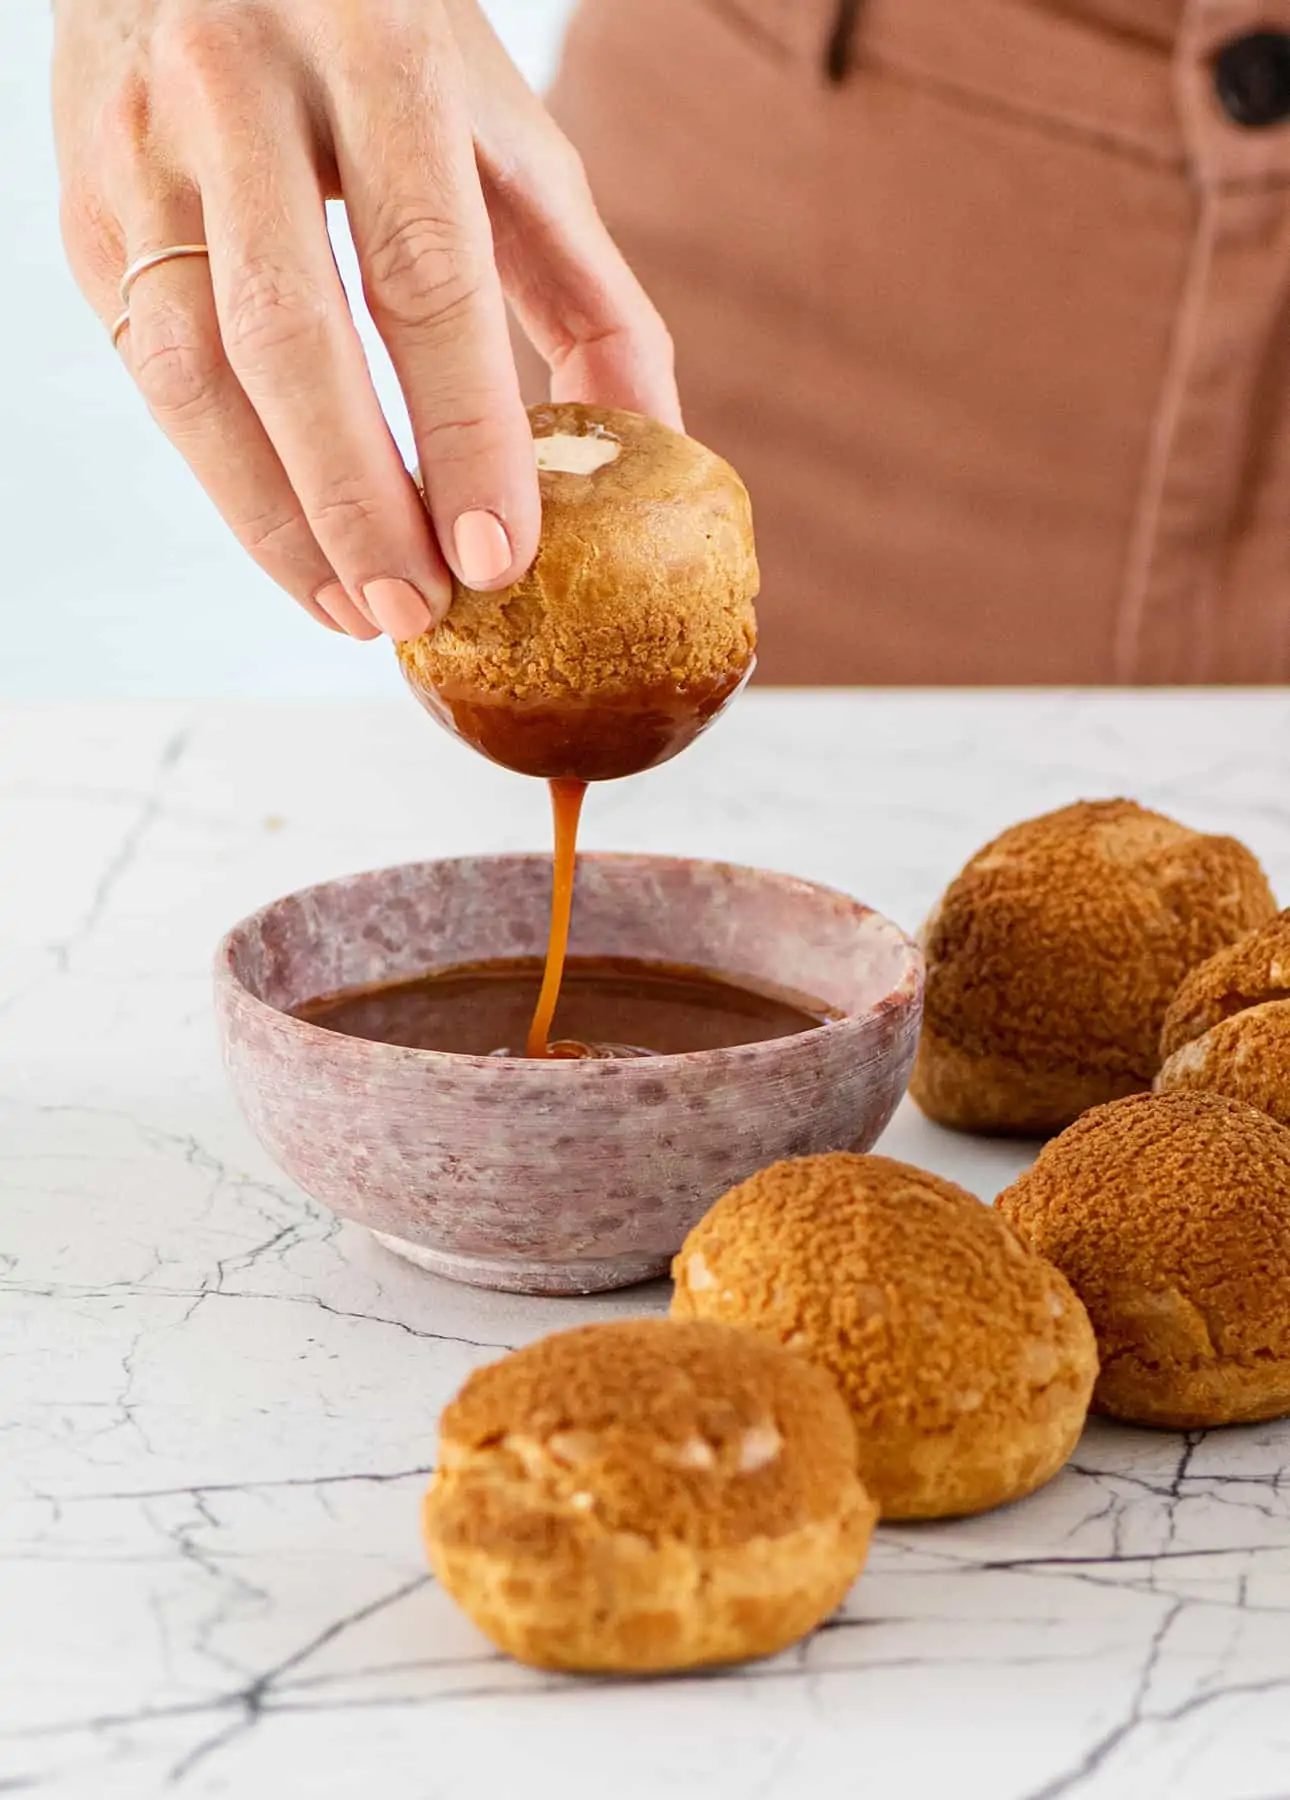
- To serve the salted caramel cream puffs: About 1 hour before service, reheat the salted caramel sauce for a few seconds in the microwave, or in a saucepan over low heat, just to loosen it a bit, then transfer to a small bowl.
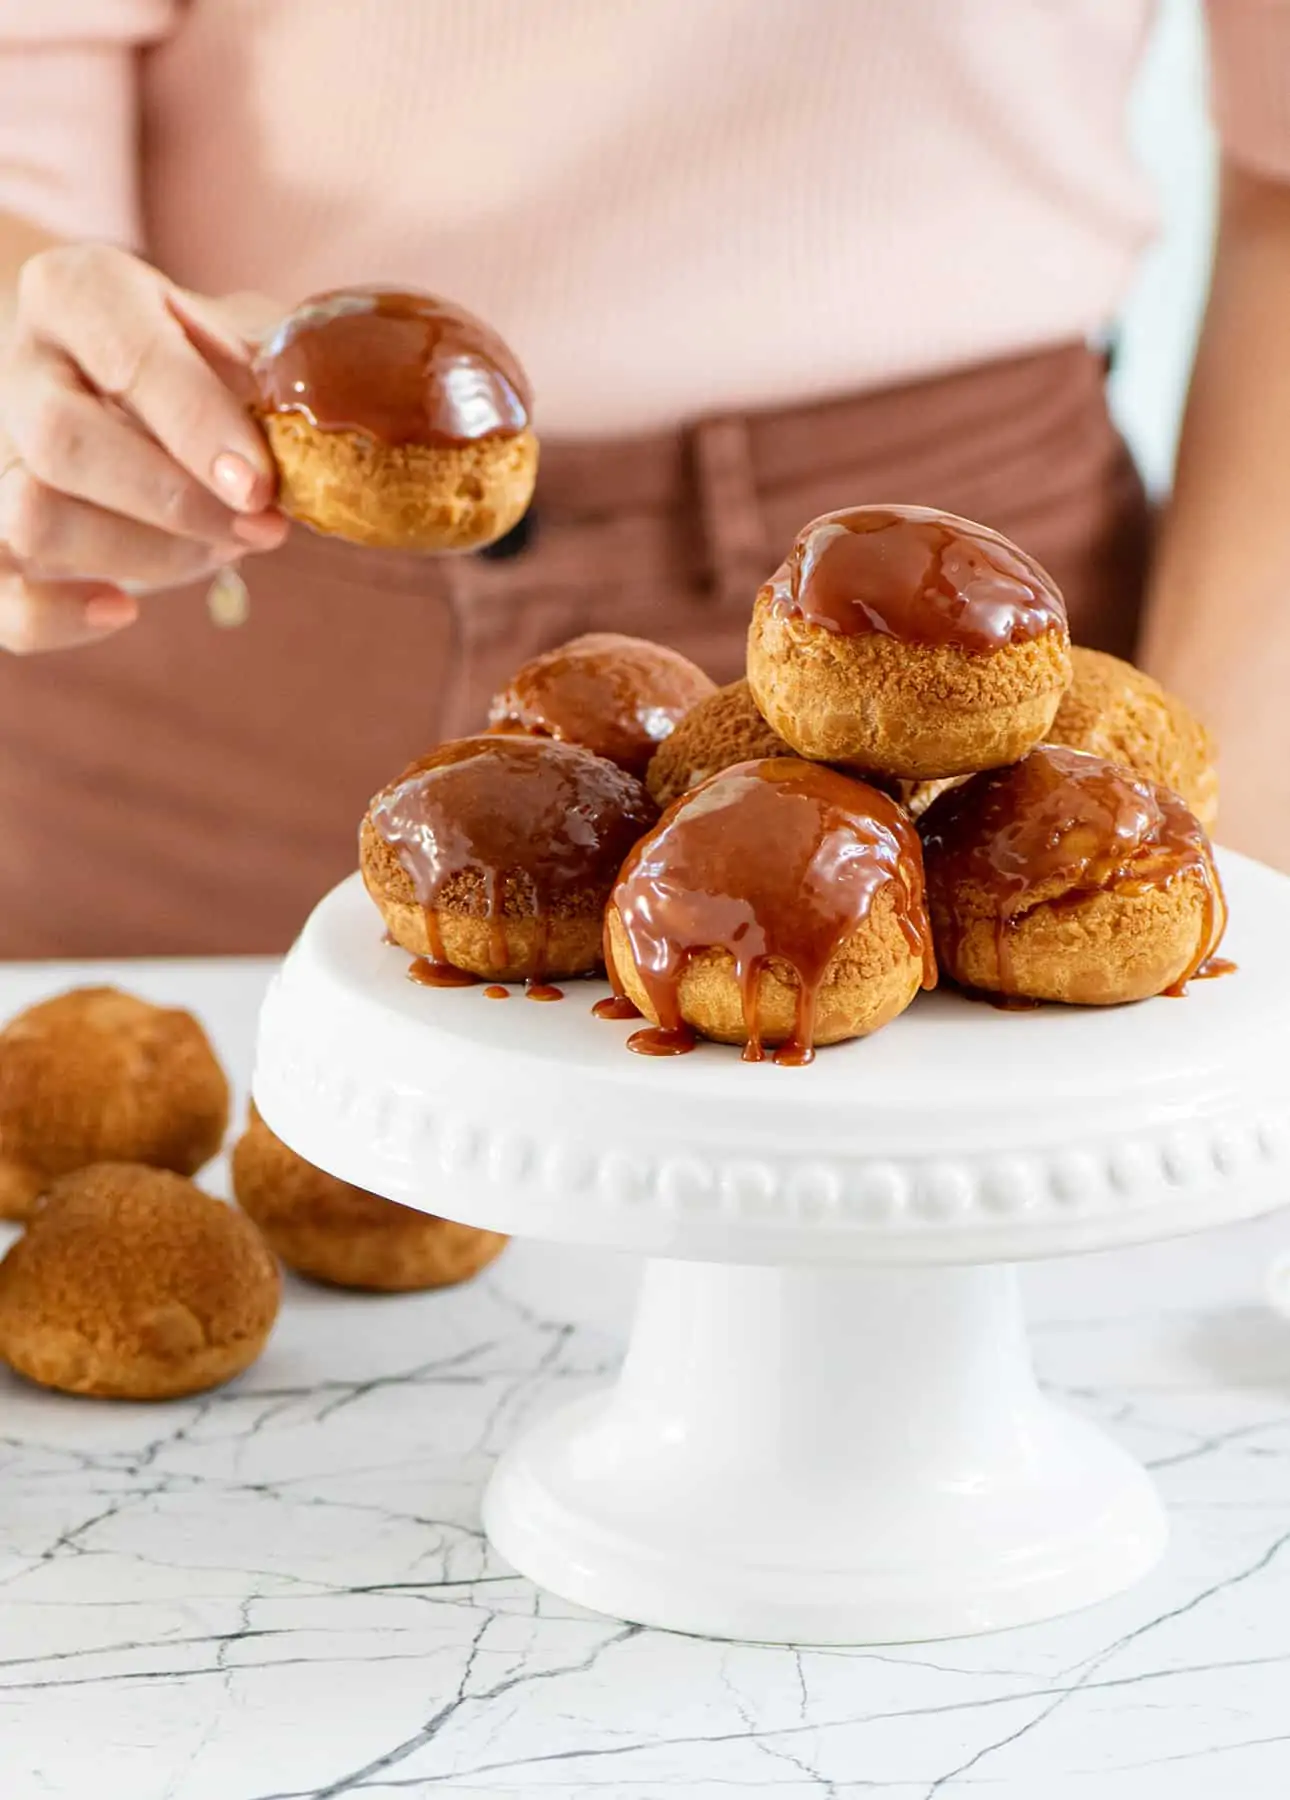
- Take one cream puff, turn it upside down and dip its top in the salted caramel sauce. Let the excess drip off, then return to a serving plate. Repeat to finish all the salted caramel cream puffs.
- Keep the salted caramel cream puffs at room temperature, in a cool spot, until service (up to 1 hour.) Enjoy!
Did you make this?
Tell me how you liked it! Leave a comment or take a picture and tag it with @foodnouveau on Instagram.
Disclosure Notice: This site is a participant in the Amazon Associates Program, an affiliate advertising program designed to provide a means for the site to earn fees by linking to Amazon and affiliated sites.
If you click on an affiliate link, I may earn advertising or referral fees if you make a purchase through such links, at no extra cost to you. This helps me creating new content for the blog–so thank you! Learn more about advertising on this site by reading my Disclosure Policy.
Author: Marie Asselin
This was a wonderful cream recipe that our entire family enjoyed. I will be making this again soon. Happy Holidays!
Heidy
Thanks Heidy, happy these puffs delighted your family!
What an amazing dessert fit for the holidays! I love the salted caramel topping and how it adds the perfect balance of sweet and salty. So delicious!
These caramels are so cute and delicious and YES so perfectly salty and sweet! When you have a minute and wrap them too, they make for a fantastic homemade gift.
I made these for a dinner party and they were a hit! Your directions were quite easy to follow.
Thanks Brianna! Happy the recipe worked well for you. A dinner party is a perfect occasion for these chic puffs!
Well worth the time and effort.. though quite hard to wait for a the full cooling time to elapse. Love salted caramel all the time!
But the reward…!! Doesn’t a bit in one of these delightful puffs make it all worth it? 😍
I have always been intimidated by the process of making cream puffs! You are making it look so very easy and I feel like I can make them myself. It’s a great post and I LOVE the step-by-step photos.
Thank you so much! Cream puffs can be quite a breeze to make, once you get the hang of whipping up choux pastry. All you need is a bit of time on your hands!
These cream puffs are amazing and that filling is not overly too sweet and so good
Thanks Linda, happy you loved them!
I made these yesterday and LOVED them! They were relatively easy to make and so, so addictive! I’m going to make them again for Christmas.
These salted caramel cream puffs are so perfect for Christmas! Move over, yule log! 🙊
These cream puffs were so delicious! I made them for our anniversary and we both loved them. Thank you!
Such a romantic dessert to make for an anniversary! Happy these puffs made your day a bit more delicious.
OMG, these salted caramel cream puffs look amazing! I am super excited to make these. Thank you for sharing this recipe!
You’re gonna love them, Ramona!