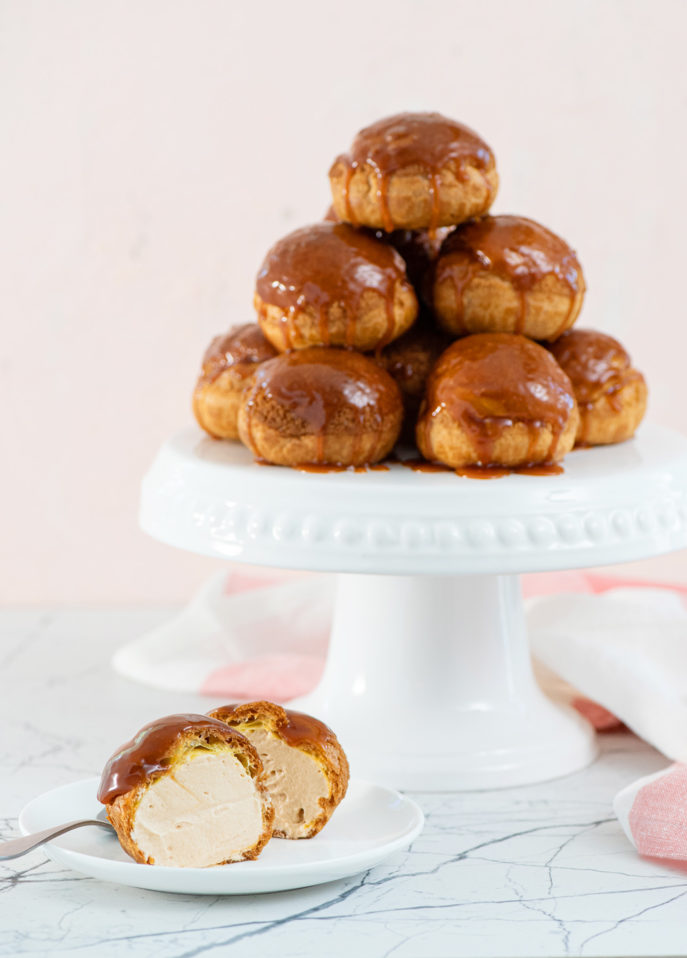
RECIPE: Salted Caramel Cream Puffs
These dreamy salted caramel cream puffs will turn you into a baking superstar and make your loved ones ask for more. Learn how to plan ahead and achieve this totally doable baking project!
Servings 30 salted caramel cream puffs
Ingredients
For the salted caramel whipped cream filling
- 2 tbsp water
- 1 tsp powdered gelatin
- 2 cups heavy cream (35% m.f.)
- 1 cup granulated sugar
- ½ tsp fleur de sel, or fine sea salt
For the salted caramel sauce
- ½ cup heavy cream (35% m.f.)
- 1 cup granulated sugar
- ½ tsp fleur de sel, or fine sea salt
For the choux craquelin
- ¼ cup butter, room temperature
- ¼ cup brown sugar
- ½ cup all-purpose flour
For the choux pastry
- ½ cup milk
- ½ cup water
- ½ cup unsalted butter (1 stick), cut into cubes
- ½ tsp kosher salt, or fine sea salt
- 1 cup all-purpose flour
- 4 large eggs
Instructions
- For the salted caramel whipped cream filling: Pour the water in a small bowl. Sprinkle the gelatin over the water, do not stir but leave to rest while you prepare the caramel.
- In the microwave or in a saucepan, warm the cream without boiling. Keep close to the stove where you’ll be preparing the caramel.
- In a medium saucepan, add the sugar. Place over medium-high heat and stay close: you need to keep an eye on the sugar melting. After 3 minutes, use a whisk to poke around and see how far along the sugar is. When you feel like the bottom of the sugar is loose and liquid, start whisking. The sugar will first get into clumps, but these will melt as the sugar heats up.As you whisk, the sugar will fully melt then turn amber as it caramelizes. When the sugar is about the color of maple syrup, take it off the heat, and immediately whisk in about ½ cup of the warm cream into the caramel. Keep your head back and hold your hand high on the whisk while you do because the caramel will produce hot steam. Slowly whisk in the remaining cream, then whisk in the gelatin mixture and the salt.
- Strain the caramel cream into a large cup or a bowl and leave to cool to room temperature. Cover and refrigerate for at least 6 hours, or ideally overnight. (The caramel cream needs to be very cold before whipping.) You can prepare the caramel cream up to 2 days in advance, but you will only whip it a few hours before using.
- For the salted caramel sauce: The process to make the salted caramel sauce is very similar to that of the salted caramel whipped cream filling.
- In the microwave or in a saucepan, warm the cream without boiling. Keep close to the stove where you’ll be preparing the caramel.
- In a medium saucepan, add the sugar. Place over medium-high heat and stay close: you need keep an eye on the sugar melting. After 3 minutes, use a whisk to poke around and see how far along the sugar is. When you feel like the bottom of the sugar is loose and liquid, start whisking. The sugar will first get into clumps, but these will melt as the sugar heats up.As you whisk, the sugar will fully melt then turn amber as it caramelizes. When the sugar is about the color of maple syrup, take it off the heat, and immediately whisk in about half of the warm cream into the caramel. Keep your head back and hold your hand high on the whisk while you do because the caramel will produce hot steam. Slowly whisk in the remaining cream, then whisk in the salt.
- Strain the salted caramel sauce into a glass jar and leave to cool to room temperature. Refrigerate for at least 3 hours. You can make the salted caramel sauce up to 2 days in advance; keep refrigerated until needed.
- For the choux craquelin: In a bowl, beat together the soft butter and brown sugar until fully incorporated. Add the flour and beat just to incorporate. The craquelin dough should have a sticky Play-Doh texture.
- Bring the craquelin dough together into a rough ball. Set over a sheet of parchment paper. Cover with a second sheet of parchment paper. Roughly flatten the dough using the palm of your hand, then use a rolling pin to roll out to a ⅛-in (3 mm) thickness.
- Peel the top sheet of parchment paper off, then use a 1½-in (4 cm) round cookie cutter to indent rounds into the dough (do not try to lift the craquelin rounds at this point.) Transfer the sheet of craquelin dough into the freezer and freeze for at least 1 hour, or up to 2 days.
- Time saving tip: Once the craquelin dough is frozen hard, you can lift the frozen craquelin rounds (use the cookie cutter to fully detach the rounds, if needed) and store them in an airtight container. Separate each layer of craquelin rounds with parchment paper to avoid sticking. The craquelin dough warm up and softens very quickly at room temperature, so you might need to return the dough to the freezer a few times to lift all craquelin rounds. Discard the scraps. Keep the craquelin rounds frozen until needed.
- For the choux pastry: In a medium saucepan, combine the milk, water, butter, and salt. Bring to a boil over medium heat. When the mixture is boiling, add the flour all at once and stir vigorously with a wooden spoon until the mixture pulls away from the sides of the pan. Keep cooking and stirring the mixture over medium heat for about 1 minute to eliminate excess moisture. If you used a stainless-steel saucepan, a thin layer of dough may stick to the bottom and sides of the pan; this is normal. Take off the heat.
- Transfer the dough to the bowl of a stand mixer, or to a large mixing bowl if using a hand mixer, and let cool for 5 minutes, stirring occasionally to allow some of the steam to come out.
- Set the mixer to medium speed, and beat the eggs in one at a time, making sure each egg is well incorporated before adding the next. Scrape down the bowl down between each addition. Every time you add an egg, the dough will separate and look curdled, but it will then come back together in a super sticky, crumbly way. The dough will keep on getting smoother as you add more eggs. The dough is done when it is very thick and stick, but also smooth and elastic.
- Choux pastry can be covered and refrigerated for up to 6 hours (half a day.) You do not need to bring choux pastry back to room temperature before baking.
- To shape the cream puffs: Line a baking sheet with parchment paper.
- If using a cookie scoop to shape the cream puffs: Fill a ¾ oz (1 ½ tbsp) cookie scoop scant with choux pastry, then wipe excess pastry off the sides of scoop (this will create cleaner mounds of dough.) Drop the ball of choux pastry on the prepared baking sheet. Repeat these steps, setting the puffs 3 inches (8 cm) apart to leave plenty of room for expansion. You should be able to fit about 10 cream puffs on a standard half-sheet pan. (Refrigerate the remaining choux pastry between batches.) Using damp fingertips, press down any peaks of dough to create round puffs.
- If using a pastry bag to shape the cream puffs: Fit a large pastry bag with a size 6 (Ateco 806) round pastry tip. (The opening should be ½-in / 1¼ cm.) Fold the top 3 inches (7 cm) of the pastry bag down over itself like a cuff. Using a spatula, scoop and push the choux pastry into the bag. Unfold the cuff and squeeze the bag to push the choux paste toward the tip. Firmly twist the top part of the bag to push the choux pastry down into the tip.
- Hold the bag with the tip perpendicular to the baking sheet. With the tip of the bag touching the sheet, squeeze gently and evenly with one hand, while guiding the tip of the bag with the other. Pipe out mounts of dough about the size of a ping pong ball (1 ½-in / 4 cm). You should be able to fit about 10 cream puffs on a standard half-sheet pan. (Refrigerate the remaining choux pastry between batches.) Using damp fingertips, press down any peaks of dough to create round puffs.
- To bake the cream puffs: Position a rack in the middle position of the oven. Preheat the oven to 400°F (200°C).
- If using, cover each cream puff with a craquelin round. Bake one sheet of cream puffs for about 30 minutes, or until the cream puffs are golden brown all around (if the puffs are light blond at the base, the puffs will collapse upon cooling.) Transfer the baking sheet to a wire rack and leave to cool completely to room temperature, at least 1 hour.
- Repeat the baking steps to prepare all cream puffs. If you have only one baking sheet, you can pull the parchment paper sheet out of the sheet and carefully transfer that to the wire rack for cooling. Run the baking sheet under cold water to cool it down, then line with parchment paper and repeat the steps to bake a second batch of cream puffs.
- How to freeze cream puffs: The cream puff shells can be frozen for up to 1 month. Bake the shells as indicated, then let them cool to room temperature. Place all the cream puff shells on a baking sheet, then place the sheet in the freezer for at least 3 hours, or overnight.
- Once the shells are frozen hard, gently transfer them to an airtight container (the frozen shells are very fragile and can break easily if they’re not handled with care.) Keep frozen for up to 1 month.
- To use frozen cream puff shells: Preheat the oven to 325°F (160°C). Place the cream puff shells on a baking sheet. Bake for 7 minutes, then transfer to a wire rack and let cool completely to room temperature. (This will return the cream puff shells to their crisp, freshly baked state.) Proceed with filling the cream puffs as indicated below.
- To assemble the salted caramel cream puffs: Take the salted caramel cream out of the refrigerator and transfer to a large bowl. Beat the salted caramel cream to firm peaks.
- Fit a large pastry bag with a size 2 (Ateco 802) round pastry tip. (The opening should be ¼-in / 0.6 cm.) Fold the top 3 inches (7 cm) of the pastry bag down over itself like a cuff. Twist the tip of the bag right over the pastry tip (this will prevent the salted caramel whipped cream from spilling out.) Set the pastry bag in a tall glass or measuring cup to keep it upright.
- Using a spatula, scoop and transfer the salted caramel whipped cream into the pastry bag. Unfold the cuff and twist the large end of the bag to close it.
- Use a sharp, pointy knife or a skewer to poke a hole under each cream puff. Pick up the pastry bag with the salted caramel whipped cream. Holding the pastry bag tip size up, gently twist the large end of the bag to push the cream toward the tip. Gently insert the tip of the bag in one cream puff and fill with salted caramel whipped cream. (You’ll know when the cream puff is full when your pastry tip gets pushed out of the puff.) Set the filled cream puff down onto a plate and repeat to fill all cream puffs.
- You can refrigerate the filled salted caramel cream puffs, uncovered, for up to 4 hours.
- To serve the salted caramel cream puffs: About 1 hour before service, reheat the salted caramel sauce for a few seconds in the microwave, or in a saucepan over low heat, just to loosen it a bit, then transfer to a small bowl.
- Take one cream puff, turn it upside down and dip its top in the salted caramel sauce. Let the excess drip off, then return to a serving plate. Repeat to finish all the salted caramel cream puffs.
- Keep the salted caramel cream puffs at room temperature, in a cool spot, until service (up to 1 hour.) Enjoy!
Did you make this?
Tell me how you liked it! Leave a comment or take a picture and tag it with @foodnouveau on Instagram.